Recently I was trying to build a complex project which included also node js code and was deployable to IIS. The error I faced on visual studio during the build was the below.
"npm run build" exited with code 1 - Visual Studio
"npm install" exited with code 1 - Visual Studio
both of which were misleading.
In order to locate the error I navigated on the Node project and tried to build using
npm run build
Command line never lies. I was able to determine that webpack was not installed.
In this guide I will explain how to build a service fabric solution using cmd and also Azure DevOps to automate your deployments.
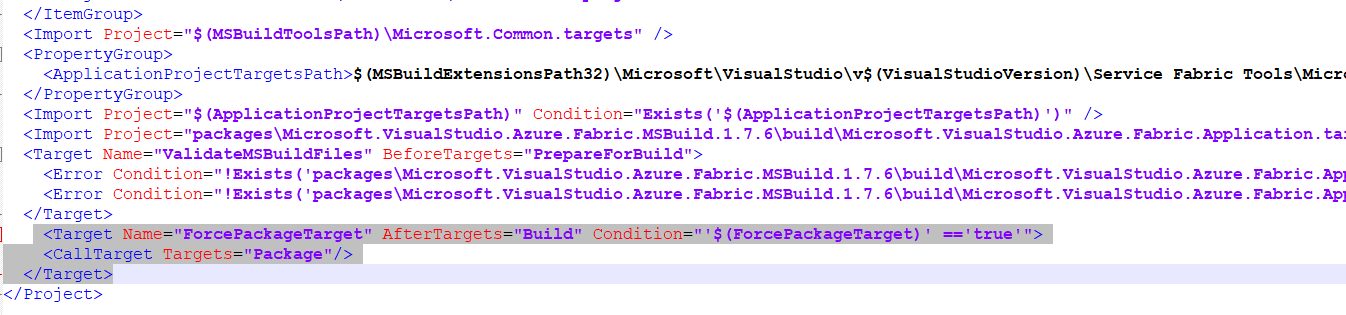
Given that you already have in place your Service Fabric solution, you should edit and add the below Target directive on your .sfproj file inside your visual studio solution.
This is needed in order to create the package that will be deployed on the service fabric cluster.
That’s all. With this option enabled you can now perform a build using the msbuild tool. You should edit servicefabric.sln to reflect your project name.
In this article I will explain how one can automate their .NET applications development using Azure DevOps. For the sake of this example I created a simple Console Application targeting .NET Framework 6.
The code only includes the below line.
Console.WriteLine("Hello from Azure Devops!");
First things first, a Git repository will be needed for the CI procedure. I chose to use Azure DevOps repositories as it is integrated with Visual studio and can be used very quickly. By pressing Add to Source Control a dialog will appear to choose the organization and project on which the repository will be created. This will create a new repository and you should then commit and push your code to the repository using the UI of Visual Studio.
After the push, the repository will be created on Azure DevOps
I disabled the automatic triggers on the repository with pr and trigger to none and I used the latest ubuntu machine as the build agent.
If a specific version of .NET is required it should be included in the task UseDotNet@2.
The building of the project is done from the DotNetCoreCLI@2 task. It will search everything with the .csproj extension and build it using the Azure CLI.
The last task that I included will run the application from the debug output folder.
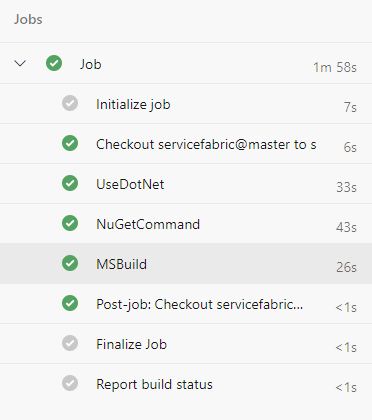
Your final pipeline should look like the one below.
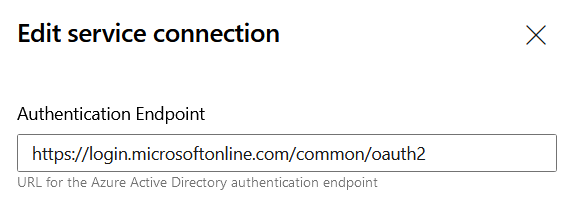
An additional issue you may face, could relate with the service connection authentication endpoint. The error indicates that the common endpoint cannot be used and the specific tenant-endpoint should be used instead.
##[error]AADSTS9001023: The grant type is not supported over the /common or /consumers endpoints. Please use the /organizations or tenant-specific endpoint.
Go and edit your service connection details
Endpoint URL:
https://login.microsoftonline.com/organizations
Be sure that your user has sufficient privileges and that prerequisites are met as documented from Microsoft.
LCS doesn’t support service-to-service authentication. Therefore, only regular user credentials (that is, a user name and password) can be used. Because the pipelines don’t run interactively, multifactor authentication must not be set up for the account that you use. We recommend that you set up a separate user account that has limited access and strong credentials that can regularly be rotated for security purposes.