Chaos engineering is crucial because it helps organizations proactively test the resilience and reliability of their systems in unpredictable environments. In today’s cloud-native architectures, services are often distributed and complex, making them vulnerable to unexpected failures. By deliberately introducing controlled failures, chaos engineering allows teams to identify weaknesses, ensure systems can recover quickly, and improve overall reliability. It helps organizations prepare for real-world disruptions, enhancing system stability and reducing downtime during critical failures.
Azure Chaos Engineering is Microsoft Azure’s platform for conducting chaos experiments to test the resilience of cloud applications running in Azure. Azure offers Chaos Studio, which allows users to simulate outages, latency issues, or resource exhaustion on various services such as Virtual Machines, Kubernetes clusters, and more. This helps developers and DevOps teams to identify vulnerabilities and fix them before they cause actual service disruptions, ensuring that applications running on Azure are robust and can handle unexpected failures.
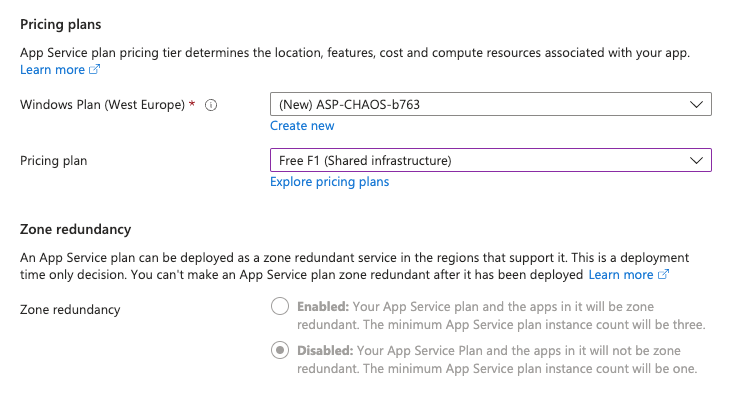
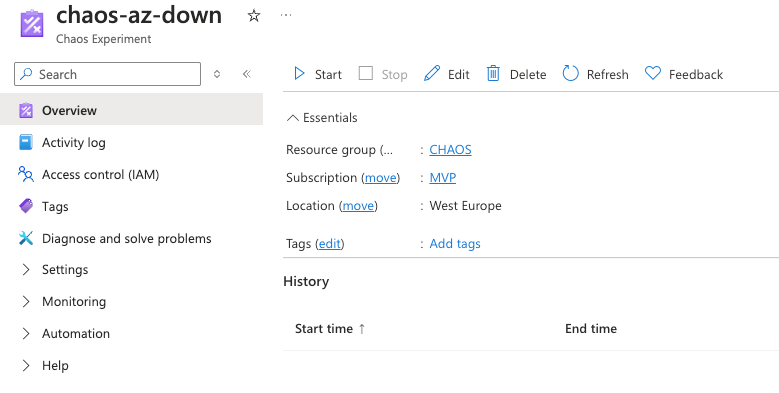
In this series of articles we will describe how we can implement our chaos engineering framework using Azure services. In order to put chaos into test we will first create an app service (web app) that we will try to test through chaos experiments. During the creation of the web app we should select the Free tier in order to have Zone redundancy disabled. This means that our application will not have high availability across different zones.
When our app is ready we can access it through the auto generated URL and we can see the content as shown below.

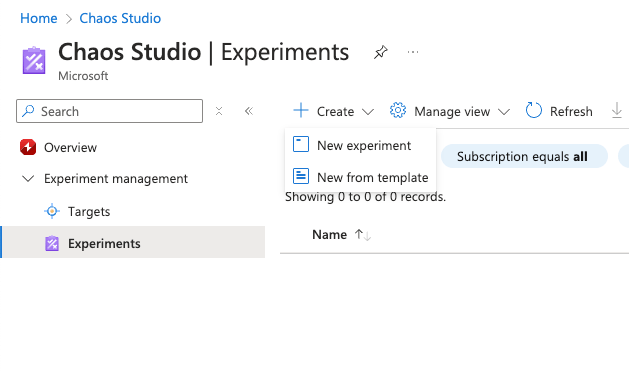
We will now navigate in azure chaos studio and press the create new experiment from template
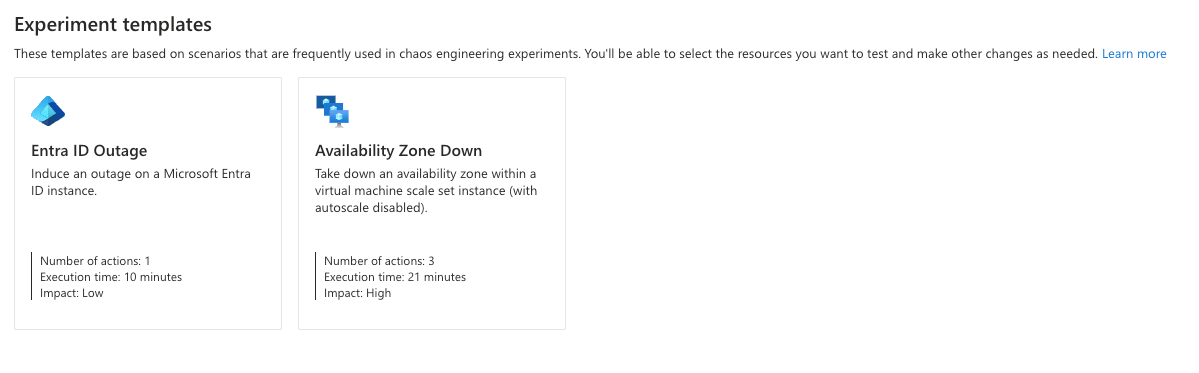
Then we will select availability zone down
and we will continue by giving a name to our experiment and also where to be placed.

Then we can select the checkbox that indicates the below
Enable custom role creation and assignment
And as a next step go to the experiment designer to configure the experiment. The most important thing we should configure is the fault action.
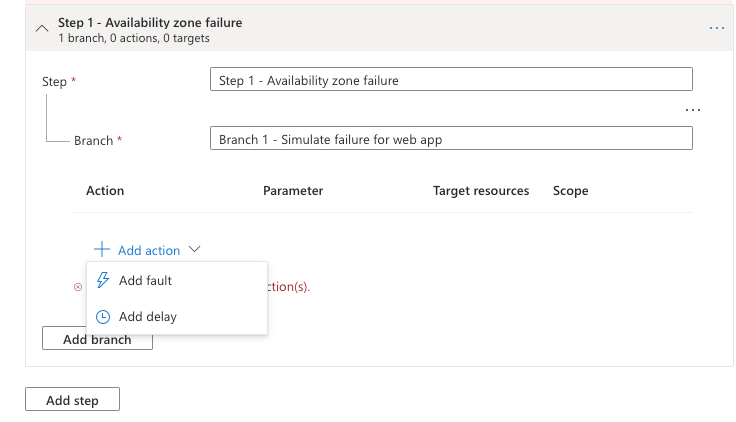
By pressing the button we can select one from the available options provided by Microsoft.
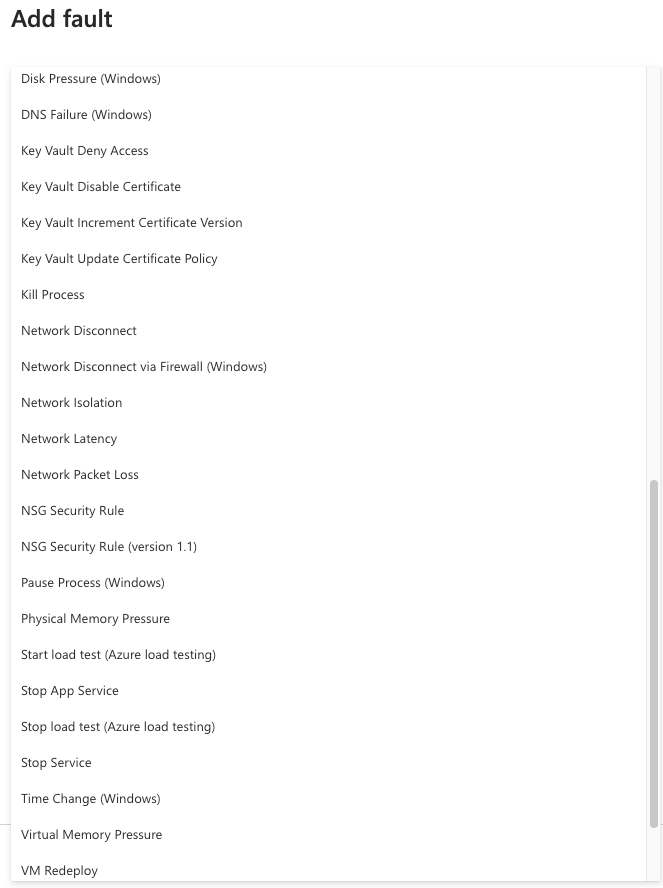
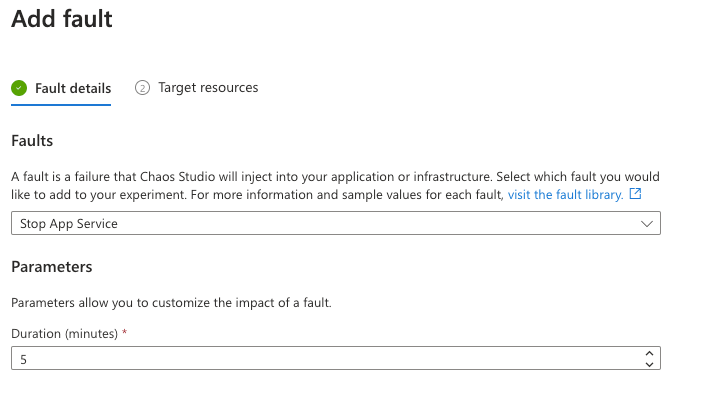
For our case we can select the stop app service action that will stop our web app inside the region. If we had high availability enabled we could see our application up and running.
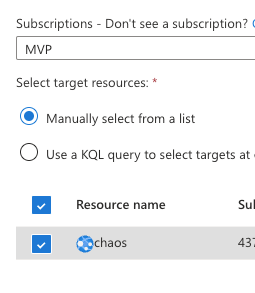
And then we should select the target. Before adding our target inside the experiment we should go under targets in chaos studio and enable our target by pressing the button.

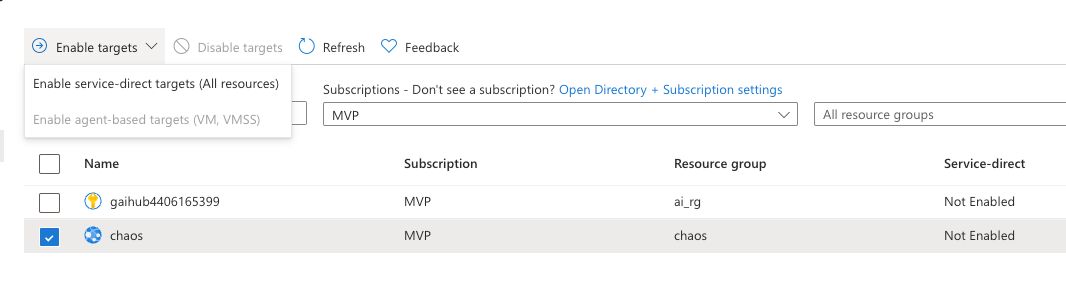
When we have our target enabled we can go under our experiment template and select our target.
Finally we press create and our experiment will be ready to use. We can execute it by pressing start and voila.
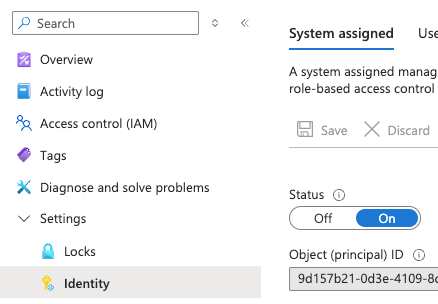
If you faced the below error you should provide the necessary permissions on the chaos identity in order to perform actions inside Azure like start/stop app service etc.
The target resource(s) could not be resolved. Please verify that your targets exist and your managed identity has sufficient permissions on all target resources. Error Code: AccessDenied. Target Resource(s):
You can do that by navigating inside the identity and pressing Azure role assignments.
When you finally have the permissions to execute the actions described in the experiment template then the experiment will start.

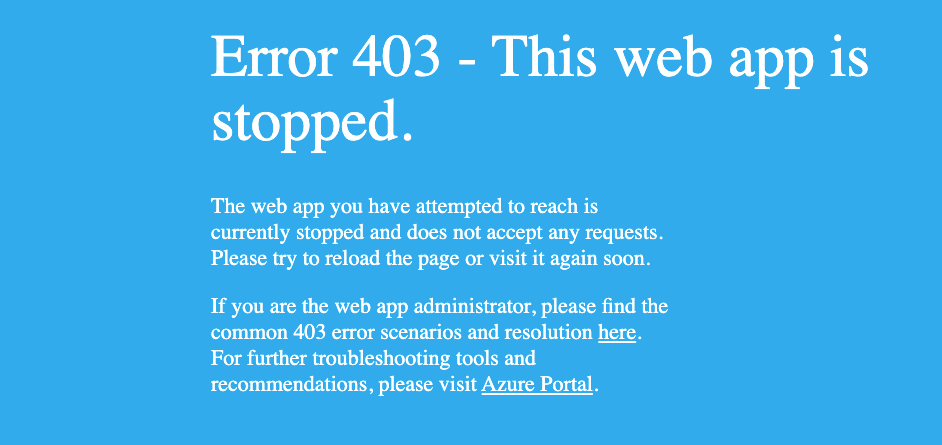
and it will stop your web app as requested.

You all know this error right? This happens because our setup is not high available an important factor that we should take into consideration in our architecture.