Posted on Leave a comment

Deploy azurerm function app with zip_deploy_file terraform

When you need to deploy code in a function app using terraform you can use the zip_deploy_file parameter. Using this you can specify a zip file that will be created from your committed code and by doing so you can dynamically deploy code using terraform.

The first thing that you will need to do is to create a folder with the code that you want to commit in the function_app. In my example I have the terraform files inside the aws and azure folders and in the same directory I have a folder called resources where the code is located. This code need to be deployed in the serverless function app.

Create a data archive_file with terraform and specify where your code is located. You should correctly point where the files are stored.

data "archive_file" "python_function_package" {  
  type = "zip"  
  source_file = "../resources/function.py" 
  output_path = "function.zip"
}

Then you should use the above data archive and use it along with zip_deploy_file.

resource "azurerm_linux_function_app" "functionapp" {
  name                = var.serviceplan_name
  resource_group_name = azurerm_resource_group.rg.name
  location            = azurerm_resource_group.rg.location

  storage_account_name       = azurerm_storage_account.sg.name
  storage_account_access_key = azurerm_storage_account.sg.primary_access_key
  service_plan_id            = azurerm_service_plan.serviceplan.id
  
  zip_deploy_file = data.archive_file.python_function_package.output_path
  app_settings              = "${var.app_settings}"

  site_config {
    application_stack {
        python_version = "3.10"
    }
  }

}

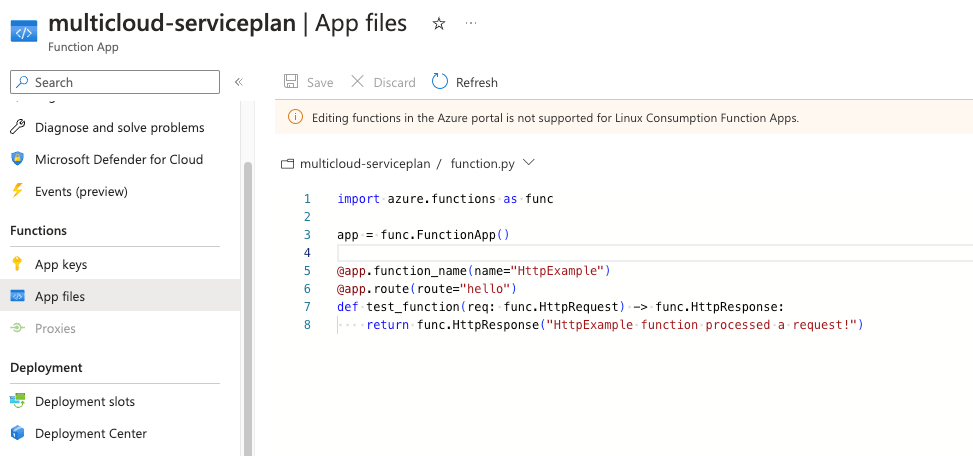
When you deploy your terraform code the function app will correctly upload the code in your infra component and you can check that by navigating inside the code on azure portal.

azurerm_linux_function_app | Resources | hashicorp/azurerm | Terraform | Terraform Registry

Posted on Leave a comment

Function Apps are not supported in Free and Shared plans. Please choose a different plan

When you use terraform and functions apps in azure you may end up with the below issue.

Creating Linux Function App: (Site Name "multicloud-serviceplan" / Resource
│ Group "multicloudrg"): web.AppsClient#CreateOrUpdate: Failure sending
│ request: StatusCode=400 -- Original Error: Code="BadRequest" Message="You
│ tried creating a function app in the 'Free' SKU. Function Apps are not
│ supported in Free and Shared plans. Please choose a different plan."
│ Details=[{"Message":"You tried creating a function app in the 'Free' SKU.
│ Function Apps are not supported in Free and Shared plans. Please choose a
│ different
│ plan.

The issue indicates that a Function app cannot be created using the Free tier F1 of the service plan.

In order to fix the issue you must select one of the additional plans Consumption, Premium or Dedicated.

In Consumption plan hosting, each function app typically runs in its own plan. In the Azure portal or in code, you may also see the Consumption plan referred to as Dynamic or Y1.

https://learn.microsoft.com/en-us/azure/azure-functions/consumption-plan

The details of each plans are described below.

https://learn.microsoft.com/en-us/azure/azure-functions/functions-scale?WT.mc_id=Portal-WebsitesExtension

The terraform issue will be resolved when you select Y1 instead of F1 which is the free tier.

Posted on Leave a comment

Create a confluence page with REST API

Confluence can become a great tool when it is combined with other services that we use. In some cases tho you cannot find an available integration but there comes the rest api that you can use.

https://developer.atlassian.com/server/confluence/confluence-rest-api-examples/

In this example we will automatically create a confluence page from another service using a rest API. In this example I was working on a custom confluence installation and not jira cloud. When using Jira Cloud the API can be different.

Using the link from confluence documentation you can locate any actions that you need to perform. Lets take as example the creation of a sub-page inside an existing page. You can find the curl API call below.

curl -X POST -H 'Content-Type: application/json' -H 'Authorization: Bearer TOKEN' -d '{"type":"page","title":"test incident","ancestors":[{"id":pageID}], "space":{"key":"dd"},"body":{"storage":{"value":"<p>This is a new page</p>","representation":"storage"}}}' https://confluence.domain.com/rest/api/content/

Description:

TOKEN: You should create a personal access token for a user with the rights to open/create/edit a page. You can use also username and password authentication with parameter -u user:password.
Title: the title of your new sub-page
Ancestors: The parent page under which to create a new page.
Space Key: your confluence space where you will create the page.
Body: you should keep the json format and pass the content you need to appear on the page body.
URL: you should use the url of the REST API. Just change the domain name and it will work on v7.18+

When we make the request we can see that a new page is created with the title that we provided.