Posted on 1 Comment

Automate VMware deployments with RedHat Ansible

This article will guide you implement automation on the deployment procedure of a VMware infrastructure. In more detail the ansible project that is listed on the bottom of the page will deploy VMs from a list that you provide on your VMware hypervisor.

The dependencies that are necessary for this solution to work are:

The community.vmware plugin which can be installed with:

ansible-galaxy collection install community.vmware

the PyVmomi package which can be installed with pip or pip3 with the command:

sudo pip3 install pyvmomi

The project consists of the below components:

  • deploy.yml which is the base script that performs the deployment.
  • ansible.cfg and inventory which are not useful for this example
  • secrets.yml which is an ansible vault that contains secrets and passwords
  • vms.yml which is the list of the VMs that we want to create.

You can run the example by using prompt so that you input the ansible vault password.

ansible-playbook deploy.yml --vault-id=@prompt

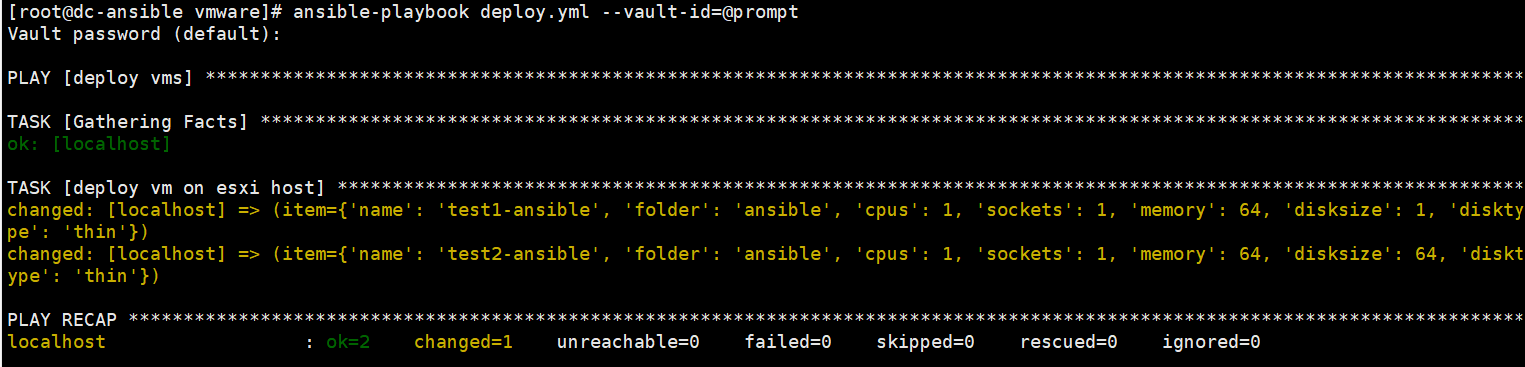
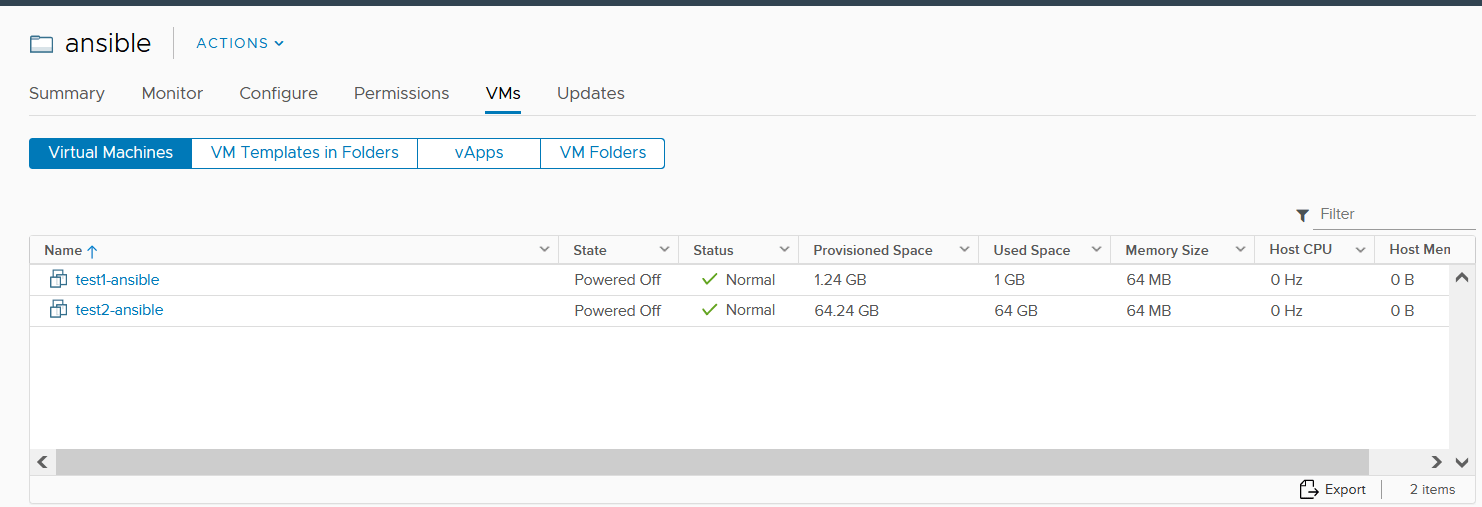
After the successful run you will get the newly created vms on the folder you specified (in my example ansible folder within the vcenter server)

https://github.com/geralexgr/ansible-vmware

https://docs.ansible.com/ansible/latest/collections/community/vmware/vmware_guest_module.html

Posted on 2 Comments

Configure passwordless authentication for ESXi – connect with publickey/privatekey

If you try to setup passwordless authentication for a Linux machine on your ESXi host and follow the same procedure that you would follow for a simple Linux box, the result will be a failure.

Normally you should do

ssh-keygen 

to create your pub, private keys and then

ssh-copy-id root@esxihost

to copy your keys on the esxi host. However this will not work and an additional step is required.

You should copy by your own the public key of your Linux machine to the ESXi host.

First of all enable ssh on the host and connect to the host.

The go to esxi and copy your public key under /etc/ssh/keys-root on authorized_keys. Keep in mind that permissions of this file should not be changed, otherwise it will not work.

After those actions you will be able to login passwordless on your esxi.

Posted on 1 Comment

Authenticate windows servers with Ansible domain user – kerberos configuration

If you try to connect with Ansible on a Windows machine with your active directory account you will get the error -> the specified credentials were rejected by the server

In order to connect through a domain account you should add some inventory variables and also install some additional components.

If you do not have the appropriate libraries installed, you should get the error shown on the below screenshot.

By trying to install kerberos and requests-kerberos through pip3 I got the error that is listed below.

sudo pip3 install requests-kerberos
Command "/usr/bin/python3.6 -u -c "import setuptools, tokenize;file='/tmp/pip-build-2v_1srr8/pykerberos/setup.py';f=getattr(tokenize, 'open', open)(file);code=f.read().replace('\r\n', '\n');f.close();exec(compile(code, file, 'exec'))" install --record /tmp/pip-nkj0fa0v-record/install-record.txt --single-version-externally-managed --compile" failed with error code 1 in /tmp/pip-build-2v_1srr8/pykerberos/

In order to resolve, first upgrade your pip3 setup tools

pip3 install --upgrade setuptools

Install python3-devel package and other required packages

yum -y install gcc python-devel krb5-devel krb5-libs krb5-workstation

Run setup with pip3 once again. The result should be successful.

Your inventory file should contain the below variables:

ansible_user = admin@DOMAIN.COM (capital letters)
ansible_connection = winrm
ansible_winrm_server_cert_validation = ignore
ansible_password = 
ansible_become_user= admin@DOMAIN.COM
ansible_become_method= runas
ansible_winrm_transport = kerberos

You should also edit Kerberos config file:

vi /etc/krb5.conf

Adjust

[logging]
                 // nothing to edit here
 [libdefaults]
     default_realm = DOMAIN.COM (capital letters)
 [realms]
  DOMAIN.COM (capital letters) = {
      kdc = dc1.domain.com
      kdc = dc2.domain.com
      admin_server = dc1.domain.com
  }
 [domain_realm]
  .domain.com = DOMAIN.COM

Grap a session for your user:

kinit -C admin@EXAMPLE.COM

And you finally can communicate with your Windows machines through an Active Directory account.

https://docs.ansible.com/ansible/latest/user_guide/windows_winrm.html

Posted on Leave a comment

There are no free physical adapters to attach to this virtual switch – VMware ESXi

In case you face the bug that is shown below on the screenshot, in order to add an uplink on your virtual switch you should use the command line and esxcli.

The command that is needed is below. In this particular example I wanted to add the uplink with name vmnic1 on virtual switch vSwitch0

esxcli network vswitch standard uplink add --uplink-name=vmnic1 --vswitch-name=vSwitch0