Posted on Leave a comment

Automatic rollback procedure for Azure DevOps

Azure devops pipelines provide a variety of tools for automated procedures. One mechanism that administrators can build using the YAML structure is an automated rollback mechanism during a deployment.

This means that after a deployment you can revert the previous state using your YAML tasks without having to redeploy. Another case would be a broken deployment which can be identified by monitoring tools and then a validation could approve or not the final release. This is exactly depicted in the below image. After releasing a version we have a validation step that requires manual approval from an administrator. If the validation is approved the release will proceed else the rollback will be triggered.

This mechanism is described below with YAML. Release stage includes release, validation and rollback jobs. Release job performs the actual release. Validation will depend on release job and will continue only if is approved. The rollback job will run only if validation failed which means that an administrator canceled the approval.

trigger: none
pr: none

stages:

- stage: releaseStage
  jobs:

  - deployment: release
    displayName: Release
    environment:
      name: dev
      resourceType: VirtualMachine
    strategy:
      runOnce:
        deploy:
          steps:
            - task: PowerShell@2
              displayName: hostname
              inputs:
                targetType: 'inline'
                script: |
                    deployment script here...
  
  - job: validation
    dependsOn: release
    pool: server
    steps:
    - task: ManualValidation@0
      inputs:
        notifyUsers: 'admin@domain.com'
        instructions: 'continue?'
        onTimeout: reject

  - deployment: rollback
    displayName: rollback
    dependsOn: validation
    condition: failed()
    environment:
      name: dev
      resourceType: VirtualMachine
    strategy:
      runOnce:
        deploy:
          steps:
            - task: PowerShell@2
              displayName: rolling back
              inputs:
                targetType: 'inline'
                script: |
                    rollback script here..
                    Write-Host "rollback"

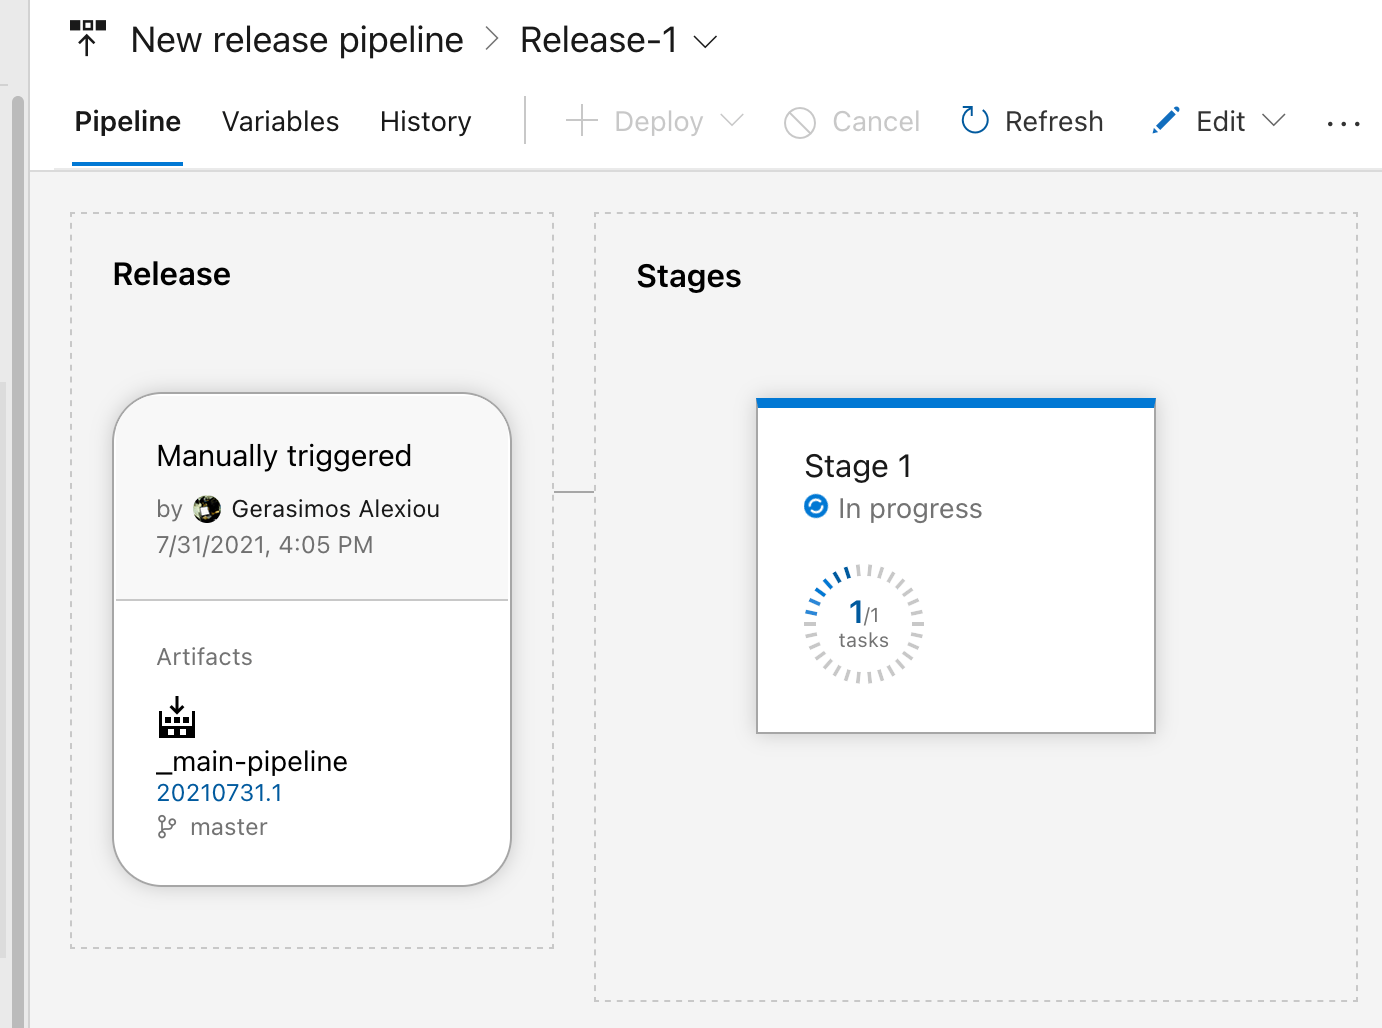
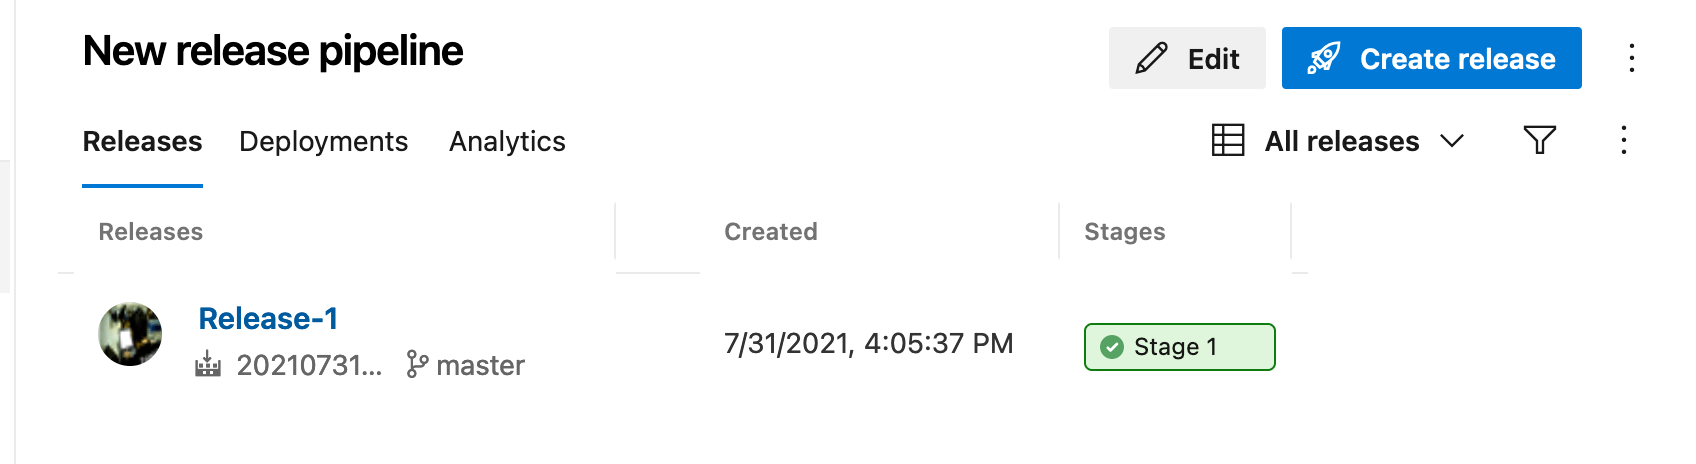
When the release can be verified from the administrator the rollback will be skipped. This is the case when the validation is approved from the user.

Validation task will ask the user for a review.

On the other hand if validation is rejected the rollback stage will run.

Posted on 1 Comment

Create approvals on build and release Azure DevOps pipelines

On Azure devops you have the option to create both build and release pipelines. The build pipelines can be created using entirely the .yml notation in comparison with the release pipelines which should be created using a GUI. Build and release pipelines have their differences when it comes to approvals.

For release pipelines in order to create an approval flow you need to navigate in the stage and click the thunder strike. There you can locate the pre-deployment approvals and also gates that can be configured for that stage.

You can also define post-deployment approvals by clicking the person icon on the stage.

On the other hand in order to create approvals on build pipelines you will need to first create an environment. From environments you need to create a new blank environment

Then you need to navigate inside the environment and select approvals and checks

The last step would be to create a deployment job through YAML and point that environment. Every job which is created as deployment and has the environment configured will go through the approvals configured.

Lets see for example the below pipeline:

trigger: none

pool:
  vmImage: ubuntu-latest


stages:

- stage: stage1
  
  displayName: stage1
  jobs:
  - deployment: job1
    displayName: job1
    environment: appservice-west
    strategy:
      runOnce:
        deploy:
          steps:
          - task: PowerShell@2
            displayName: run powershell 1
            inputs:
              targetType: 'inline'
              script: |
                Write-Host "Hello from powershell 1"

- stage: stage2
  dependsOn: stage1
  displayName: stage2
  jobs:
  - deployment: job2
    displayName: job2
    environment: appservice-west
    strategy:
      runOnce:
        deploy:
          steps:
          - task: PowerShell@2
            displayName: run powershell 2
            inputs:
              targetType: 'inline'
              script: |
                Write-Host "Hello from powershell 2"

Before the execution of job1 and job2 an approval will be asked the way it is configured from the environment.

Posted on 5 Comments

Pass parameters from build to release pipelines on Azure devops

When you need to pass parameters between your build and release pipelines it could be a real struggle if you do not want to use variable groups. Variable groups can accomplish the requested (to pass values between build and release pipelines) but this scenario is not useful for a parametric input which is a common case when deploying a project. You can accomplish that either by using a plugin from another publisher or by following the publish artifacts procedure that I will describe.

In order to pass variables between your build and release pipelines you can create/export a file containing your variable on your build agent. This file should be exported as build artifact and then downloaded on the release pipeline.

The below build pipeline implements the functionality I described. The exported file is named projectname.txt and will be located on artifacts folder on your build agent inside folder drop. For example C:\agent\1\a\drop

trigger:
- dev

pool:
  vmImage: windows-latest

parameters:
  - name: powerenvironment
    displayName: Where to deploy?
    type: string

steps:

- task: PowerShell@2
  inputs:
    targetType: 'inline'
    script: |
      $variable = '${{parameters.powerenvironment}}'
      $variable | Out-File $(Build.ArtifactStagingDirectory)\projectname.txt
      Get-Content $(Build.ArtifactStagingDirectory)\projectname.txt

- task: PublishBuildArtifacts@1
  inputs:
    PathtoPublish: '$(Build.ArtifactStagingDirectory)'
    ArtifactName: 'drop'
    publishLocation: 'Container'

When you run the pipeline you will be asked for a parameter. I gave this entry my name which will be passed on release.

My release pipeline will download the build artifacts and get the value of the file. The release pipeline includes two steps.

The first one downloads the folder drop from build artifacts. The projectname.txt is located there.

Then the powershell will print the contents of the projectname.txt

You can check the result and verify you get the parameter input value from the powershell script.

Bonus content:

You can also write your input parameter as a variable on the build agent and reference this value on a later step. This should be again a powershell step on your release pipeline.

$myVariable = "ProjectName";
$myValue = Get-Content $(System.ArtifactsDirectory)/drop/projectname.txt;

Write-Host "##vso[task.setvariable variable=ProjectName]($myValue)";

Lastly create a dump archive step to reference the input parameter from the build pipeline.

In order to test, use in the archive path the ProjectName variable.

Run the pipeline and verify that input parameter is correct (I used gerasimos).

Youtube video:

Posted on Leave a comment

Create a release pipeline and deploy to local Kubernetes cluster with Azure Devops

On a previous article I described how you could create your self hosted agent to run your pipelines on Azure Devops. In this article I will explain how you can use this agent to deploy resources on your local Kubernetes cluster. As a prerequisite you should already have a kubernetes cluster locally. You can do that by installing Docker and enable the option for a kube cluster.

First things first you should connect your local Kubernetes cluster with Azure devops. For that reason you should go on Project settings -> Service connections and select Kubernetes

You can select between three different options. I selected kubeconfig

Get the output of the below command and paste it on the box. Then select untrusted certificates and add press verify and save.

kubectl config view --raw

Then you should go and create a release pipeline. Go on releases tab and press create release.

In the setup of the release pipeline you can change the trigger from automatic to manual. You should select your build pipeline that will trigger the release. In my case I selected the one I created on a previous article.

On the tasks of the release pipeline you should select the agent pool, as a result your self hosted agent. Depending on which pool you placed your agent you should add it appropriately. In my case it was on the default pool.

Then you can go and create the tasks of the release.

I chose two tasks, one for a deployment creation through kubectl commands and another one for a service exposure. You could also apply a .yml config file.

In this deployment I selected a sample image I created on a previous article, selected the namespace, added the requested parameters and selected create as the command. KubernetesConnection is the service connection that you will create and add on the first steps.

When you run the release pipeline you should see that the self hosted agent will be prepared for the run.

The job will start on your locally deployed agent.

The stages will start running.

Taken into account that everything is correct with your commands and configuration the job will be successful.

The green button of result indicate the win of your try.