Posted on Leave a comment

Using slots with appservice for Continuous delivery – Azure DevOps

Azure deployment slots allow your web apps to function in different instances called slots. Slots are different environments accessed through a publically available endpoint. One app instance is always assigned to the production slot, where you can toggle between multiple app instances on demand. This could contribute to have your application always available and deploy different versions without a downtime.

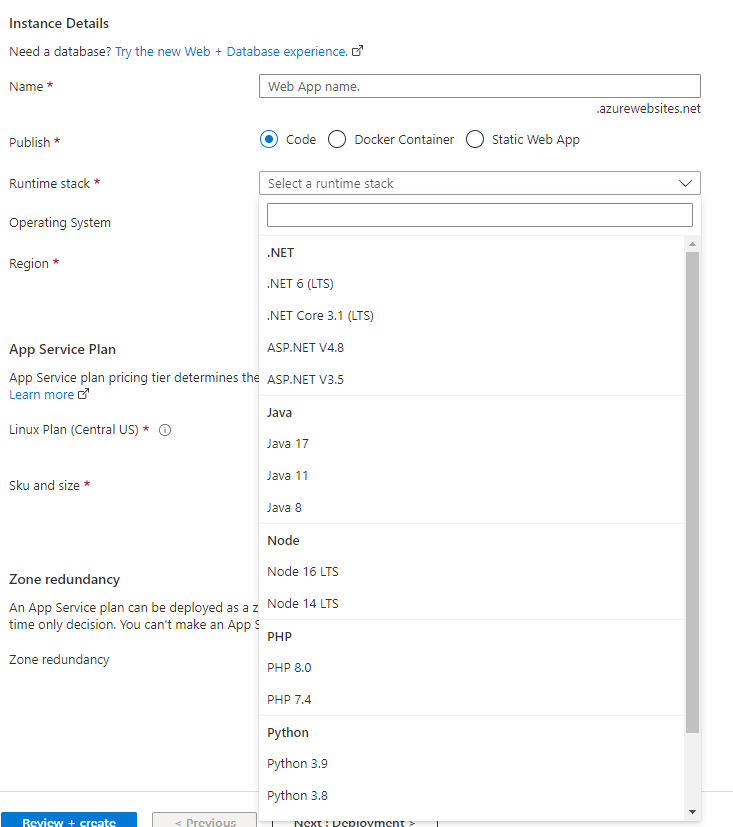
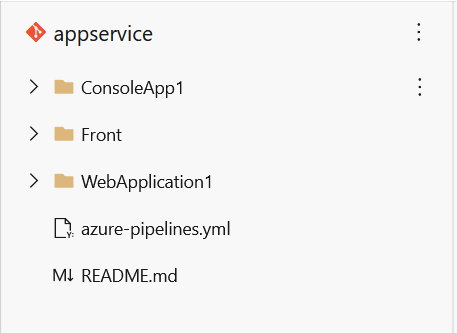
In this scenario we will examine an appservice setup called gservice that has a staging slot.

This staging slot will be used to deploy the code first, then do some health checks and finally swap this slot on production. In this article I will explain only the release procedure. If you want to learn how to build an appservice check the article attached below.

In the initial setup the staging environment and also the production one are both on v1. Lets say that code is pushed on the repository and now the version of the code is v2.

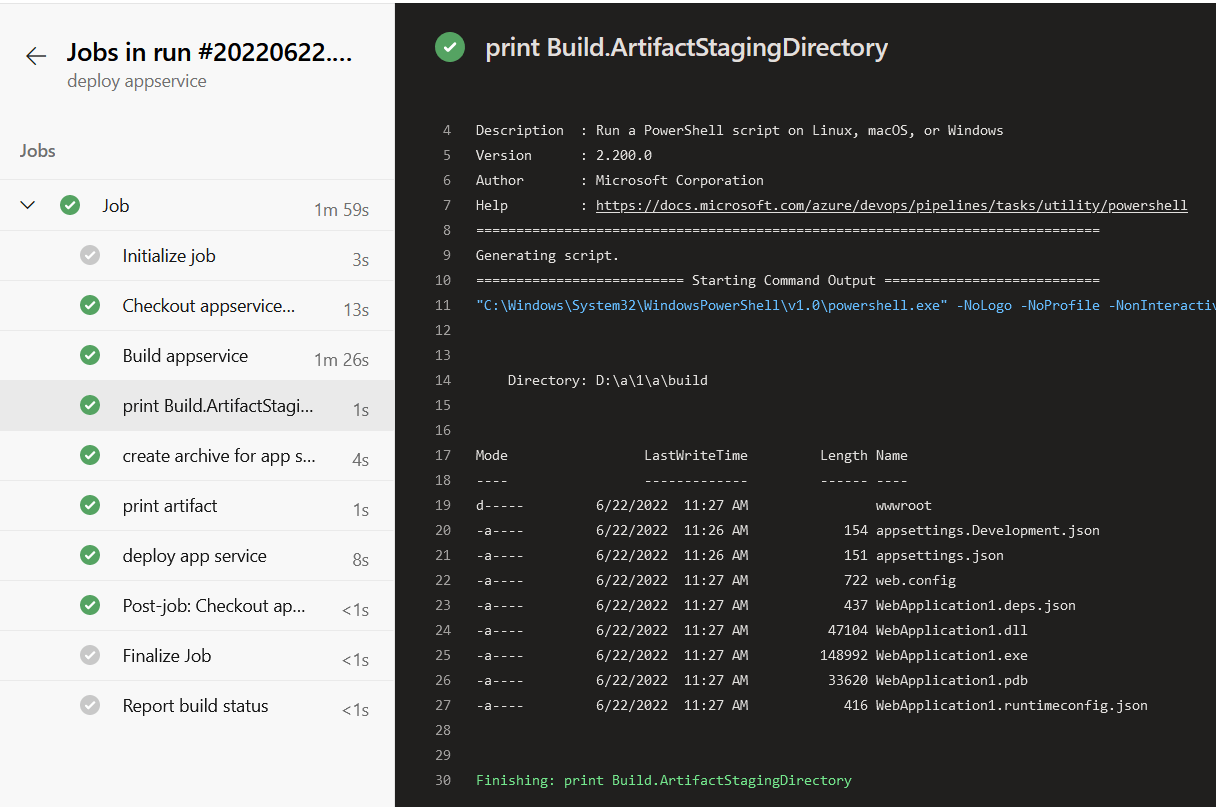
The first thing to do in the deployment would be to deploy the code on staging slot. This is an important step.

The code should be always deployed to staging slot.

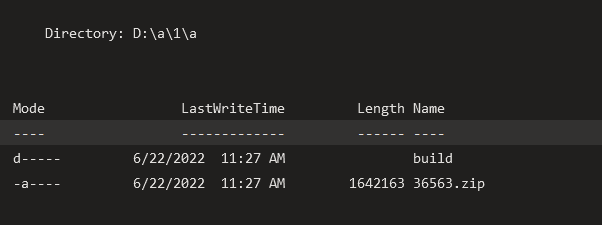
Then after the code deployment some health tests will follow. If everything goes as expected we will need to swap the slots.

The swap should be performed always from staging to production slot.

After those two steps on your release pipeline you will have your code published on the production app service and the staging slot will retain the previous build for failover and backup reasons.

Posted on 1 Comment

Deploy an app service (web app) using Azure DevOps

In this article I will demonstrate how one can deploy app service code on Azure through Azure DevOps. App service is a hosting provider for your applications (web app) that can be created with multiple hosting options and application specific settings.

When creating an app service you can choose from many available options like different code frameworks or even container deployments.

For my demo I wanted to deploy an asp .net core web api using .net 6 version hosted on windows app service.

My repository structure is shown below. The app service that I want to deploy is the one located under Front folder.

The pipeline code can be found below:

trigger:
– none
pool:
vmImage: windows-latest
steps:
– task: VSBuild@1
displayName: Build appservice
inputs:
solution: '$(Build.SourcesDirectory)/Front/**\*.sln'
msbuildArgs: '/p:Configuration=Debug /p:Platform="Any CPU" /p:WebPublishMethod=FileSystem /p:publishUrl="$(Build.ArtifactStagingDirectory)/build" /p:DeployOnBuild=true'
clean: true
– task: ArchiveFiles@2
displayName: create archive for app service deployment
inputs:
rootFolderOrFile: '$(Build.ArtifactStagingDirectory)\build'
includeRootFolder: false
archiveType: 'zip'
archiveFile: '$(Build.StagingDirectory)/$(Build.BuildId).zip'
replaceExistingArchive: true
– task: AzureRmWebAppDeployment@4
displayName: deploy app service
inputs:
ConnectionType: 'AzureRM'
azureSubscription: 'ServiceConnectionName'
appType: 'webApp'
WebAppName: 'AppServiceName'
packageForLinux: '$(Build.StagingDirectory)/**/*.zip'

In more detail there are three necessary steps for the deployment.

The first task will build the .NET app using VSbuild task. The build will use as parameters the deployonBuild and the webpublishmethod as filesystem in order to specify the path on which the build output will be stored.

The second task will bundle this build output to a zip file and then the third task will upload this .zip file in the app service using a service connection with the subscription. The two parameters that should be changed are azureSubscription and WebAppName which should be the app service name.

When running the pipeline, a build folder will be created as shown in the below screenshot that will host the build output.

This output will be then zipped to a file that will be uploaded to the app service.

Posted on Leave a comment

How Azure DevOps pipelines agent works

Azure DevOps agent is the tool on which the automation pipelines will run. Microsoft has already created predefined agent pool (macos, ubuntu, linux) for administrators to run their pipelines. These agent pools can be selected using the vmImage instruction.

pool:
vmImage: 'windows-latest' or 'ubuntu-latest' or 'macos-latest'

I have already documented the DevOps agent creation procedure and can be found on the below URL.

During the installation, the agent working directory should be selected. This is the installation path, where the pipelines files will be stored during the execution. Lets say for example that you select the C:\agent directory. During the installation a folder named work will be created and also some other folders as _diag, bin, externals. Inside the _diag folder the logs for the agent are saved.

As a result if you need to troubleshoot an Azure DevOps agent you should investigate the logs under C:\agent\_diag

Inside the work folder the pipeline files that are necessary for the runs are saved. For every pipeline run a new ID is created that will store all the files that are necessary for this run. This will be the run working directory and it is isolated between different runs. The numbers represent a build pipeline run and folders that begin with the letter r represent a release pipeline run.

Build pipelines -> Numbers
Release pipelines -> rNumber

Inside the pipeline working directory there is also a sub hierarchy with three folders (a, b, s). 

The a folder is used for the artifacts and can be used to place output files. 
The b folder is used for builds
The s folder is used for the source code checkout of repositories. 

You can access these folders using the predefined variables. For example you can find the a folder with $(Build.ArtifactStagingDirectory) or the sources folder using $(Build.SourcesDirectory)

These predefined variables will let you interact with the building and publishing procedure and you should avoid using static entries like indicating the path itself (best practices) 

Predefined variables — Azure Pipelines | Microsoft Docs

Posted on 1 Comment

Enable Diagnostic settings for Azure App service using terraform loop

Imagine that you want to enable diagnostic settings for multiple app services on Azure using terraform. The required options can be located under Monitoring tab.

A appropriate rule option should be created to indicate where the logs should be sent. 

The available categories can be located below and I will instruct terraform to enable them all.

In order to accomplish that through terraform I used a loop. The depends_on keyword is used because firstly the app services should be created and then the diagnostic settings for them. Create a file like app_diagnostics.tf and place it inside your terraform working directory.

resource "azurerm_monitor_diagnostic_setting" "diag_settings_app" {
  depends_on = [ azurerm_windows_web_app.app_service1,azurerm_windows_web_app.app_service2 ]
  count = length(local.app_service_ids)
  name               = "diag-rule"
  target_resource_id = local.app_service_ids[count.index]
  log_analytics_workspace_id = local.log_analytics_workspace_id
  
  dynamic "log" {
    iterator = entry
    for_each = local.log_analytics_log_categories
    content {
        category = entry.value
        enabled  = true

        retention_policy {
      enabled = false
        }
    }
   
  }

  metric {
    category = "AllMetrics"

    retention_policy {
      enabled = false
      days = 30
    }
  }

}

Inside locals.tf I have created a variable that holds the app services ids, the log analytics workspace ID on which the logs will be sent and also the categories which I want to enable on Diagnostics. As shown on the first screenshot all the categories are selected.

locals {

 log_analytics_workspace_id = "/subscriptions/.../geralexgr-logs" 
 log_analytics_log_categories     = ["AppServiceHTTPLogs", "AppServiceConsoleLogs","AppServiceAppLogs","AppServiceAuditLogs","AppServiceIPSecAuditLogs","AppServicePlatformLogs"]

app_service_ids = [azurerm_windows_web_app.app_service1.id,azurerm_windows_web_app.app_service2.id]
}

As a result the loop will enable for every app service you add on app_service_ids each Diagnostic category placed on log_analytics_log_categories variable.