Recently working on a pipeline, I wanted to restore multiple transaction log backups on a MS SQL server. The files were located under R:\files\incremental.
You can use below powershell in order to do the restore automatically.
This file contains hidden or bidirectional Unicode text that may be interpreted or compiled differently than what appears below. To review, open the file in an editor that reveals hidden Unicode characters.
Learn more about bidirectional Unicode characters
The above powershell will try to restore the X transaction log in the database. If the one is already restored, it will skip, else the log will be restored.
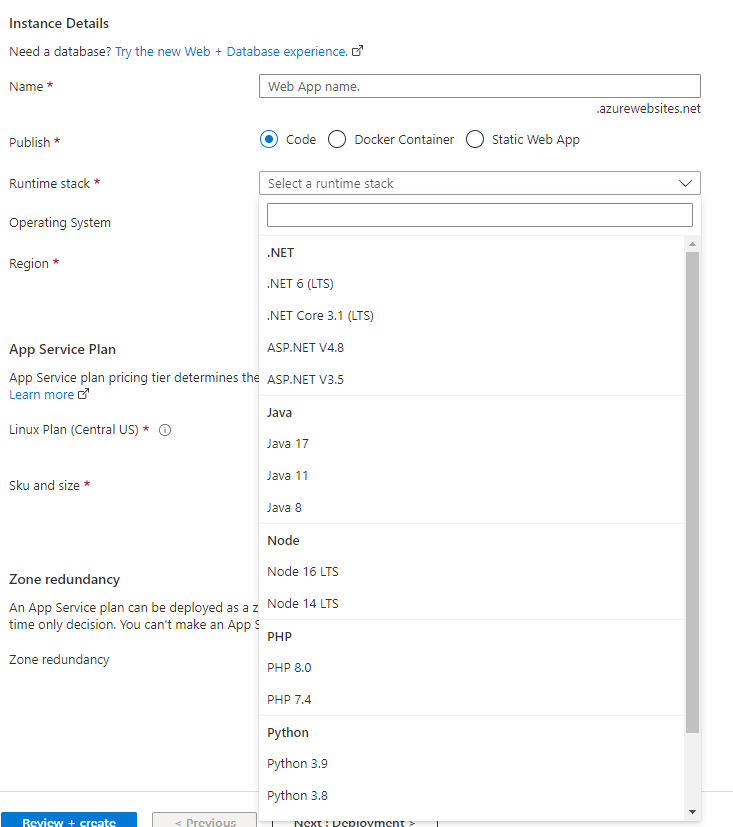
In this article I will demonstrate how one can deploy app service code on Azure through Azure DevOps. App service is a hosting provider for your applications (web app) that can be created with multiple hosting options and application specific settings.
When creating an app service you can choose from many available options like different code frameworks or even container deployments.
For my demo I wanted to deploy an asp .net core web api using .net 6 version hosted on windows app service.
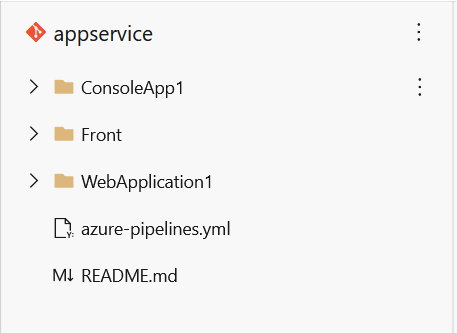
My repository structure is shown below. The app service that I want to deploy is the one located under Front folder.
The pipeline code can be found below:
This file contains hidden or bidirectional Unicode text that may be interpreted or compiled differently than what appears below. To review, open the file in an editor that reveals hidden Unicode characters.
Learn more about bidirectional Unicode characters
In more detail there are three necessary steps for the deployment.
The first task will build the .NET app using VSbuild task. The build will use as parameters the deployonBuild and the webpublishmethod as filesystem in order to specify the path on which the build output will be stored.
The second task will bundle this build output to a zip file and then the third task will upload this .zip file in the app service using a service connection with the subscription. The two parameters that should be changed are azureSubscription and WebAppName which should be the app service name.
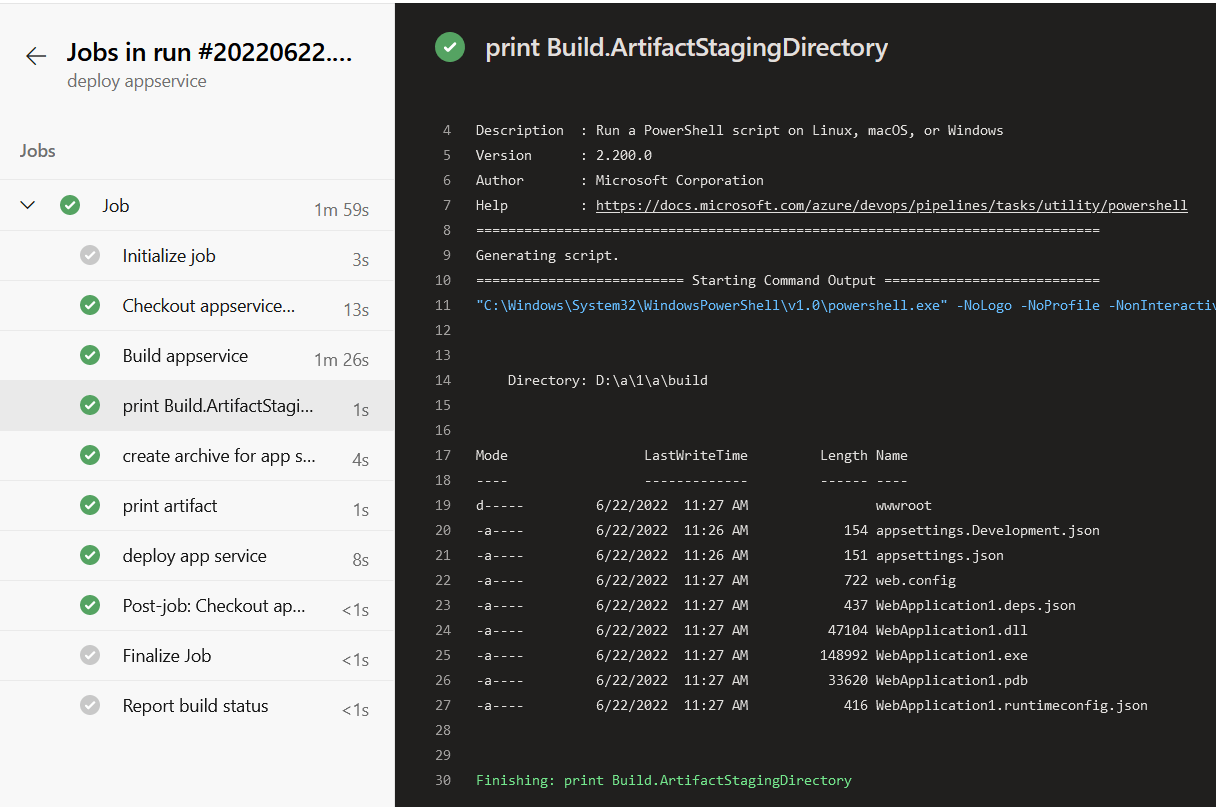
When running the pipeline, a build folder will be created as shown in the below screenshot that will host the build output.
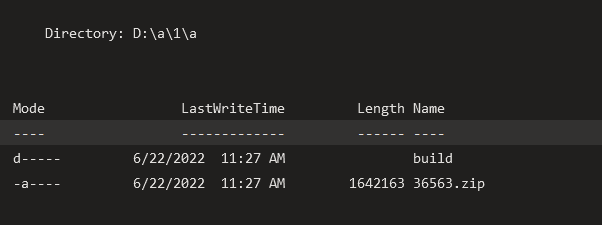
This output will be then zipped to a file that will be uploaded to the app service.
Azure DevOps agent is the tool on which the automation pipelines will run. Microsoft has already created predefined agent pool (macos, ubuntu, linux) for administrators to run their pipelines. These agent pools can be selected using the vmImage instruction.
pool:
vmImage: 'windows-latest' or 'ubuntu-latest' or 'macos-latest'
I have already documented the DevOps agent creation procedure and can be found on the below URL.
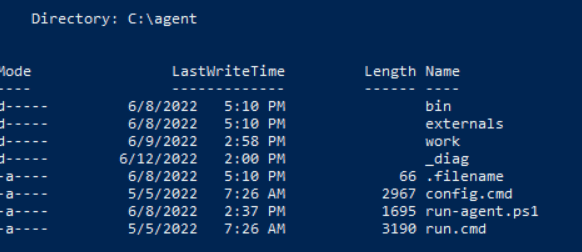
During the installation, the agent working directory should be selected. This is the installation path, where the pipelines files will be stored during the execution. Lets say for example that you select the C:\agent directory. During the installation a folder named work will be created and also some other folders as _diag, bin, externals. Inside the _diag folder the logs for the agent are saved.
As a result if you need to troubleshoot an Azure DevOps agent you should investigate the logs under C:\agent\_diag
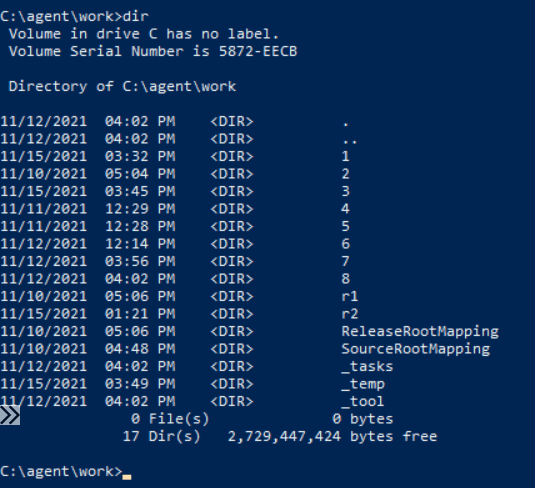
Inside the work folder the pipeline files that are necessary for the runs are saved. For every pipeline run a new ID is created that will store all the files that are necessary for this run. This will be the run working directory and it is isolated between different runs. The numbers represent a build pipeline run and folders that begin with the letter r represent a release pipeline run.
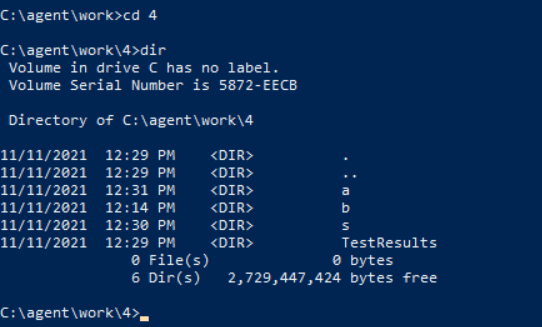
Inside the pipeline working directory there is also a sub hierarchy with three folders (a, b, s).
The a folder is used for the artifacts and can be used to place output files. The b folder is used for builds The s folder is used for the source code checkout of repositories.
You can access these folders using the predefined variables. For example you can find the a folder with $(Build.ArtifactStagingDirectory) or the sources folder using $(Build.SourcesDirectory).
These predefined variables will let you interact with the building and publishing procedure and you should avoid using static entries like indicating the path itself (best practices)
Most organizations rely on their backup solutions for application faults or data corruptions. However the backup is not frequently tested in order to verify that restore would be successful. In this post I implement a backup testing mechanism.
Lets examine a scenario for an MS SQL database server. The server will output a backup file (.bak) on a storage account based on a retention policy. This backup will be automatically restored on a SQL server through a pipeline and a result will be written as an output. The result can be then reported on the monitoring solution.
The flow is depicted below. An azure devops agent should be installed on the server on which the database will be restored. The pipeline will fetch the backup file from the storage account and store it on a data disk (in my case R:\files). Then sqlcmd command will be used to restore the .bak file and record the result. The backup file is provided by a parameter on the pipeline. Also a service connection should be created with your subscription on which the storage account is located.
Pipeline code:
This file contains hidden or bidirectional Unicode text that may be interpreted or compiled differently than what appears below. To review, open the file in an editor that reveals hidden Unicode characters.
Learn more about bidirectional Unicode characters
Azure DevOps agent service is configured to run with a specific account (in my case NT/ Local System). This account should have the appropriate permissions on the SQL server for the restore procedure. The easier way would be to make this account a database sysadmin.
Adding the NT Authority\System on SQL server sysadmins