If you try to setup passwordless authentication for a Linux machine on your ESXi host and follow the same procedure that you would follow for a simple Linux box, the result will be a failure.
Normally you should do
ssh-keygen
to create your pub, private keys and then
ssh-copy-id root@esxihost
to copy your keys on the esxi host. However this will not work and an additional step is required.
You should copy by your own the public key of your Linux machine to the ESXi host.
First of all enable ssh on the host and connect to the host.
The go to esxi and copy your public key under /etc/ssh/keys-root on authorized_keys. Keep in mind that permissions of this file should not be changed, otherwise it will not work.
After those actions you will be able to login passwordless on your esxi.
If you try to connect with Ansible on a Windows machine with your active directory account you will get the error -> the specified credentials were rejected by the server
In order to connect through a domain account you should add some inventory variables and also install some additional components.
If you do not have the appropriate libraries installed, you should get the error shown on the below screenshot.
By trying to install kerberos and requests-kerberos through pip3 I got the error that is listed below.
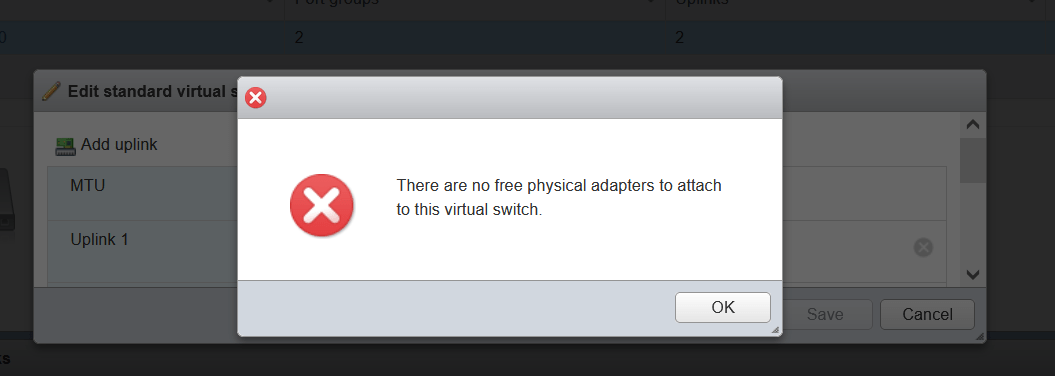
In case you face the bug that is shown below on the screenshot, in order to add an uplink on your virtual switch you should use the command line and esxcli.
The command that is needed is below. In this particular example I wanted to add the uplink with name vmnic1 on virtual switch vSwitch0
esxcli network vswitch standard uplink add --uplink-name=vmnic1 --vswitch-name=vSwitch0
If you face an issue during the deletion of a dump file that reside on a Datastore, you should deactivate the dump on the host and then try to delete it.
You can get a list of used dumpfiles on your ESXi host by connecting with ssh and performing the below command:
esxcli system coredump file list
This will output the dumpfiles that are currently in use, which will have true on the active column.
In order to de allocate the dump file you should unset the dump file and then retry to delete either by command or with the GUI.
esxcli system coredump file set -u
The command that will force the deletion is the below:
esxcli system coredump file remove -f /vmfs/volumes/volume/vmkdump/11111111-2222-3333-4444-555555555555.dumpfile