Posted on 5 Comments

Trigger Azure Devops build pipelines using REST API

In some cases you may need to schedule pipelines execution on nights but the schedules yaml feature cannot accomplish your needs. This could could happen if you have to provide parameters as inputs on the pipelines for a specific project export/import. In this case you could trigger your pipelines with REST APIs using ansible or another scripting tool.

In this article I will explain how you could trigger pipelines execution using the REST API of Azure Devops.

First things first you should create a personal access Token (PAT) in order to get the access required to run the pipelines on your organization. You can accomplish that by pressing your profile icon and selecting the sub-menu shown below.

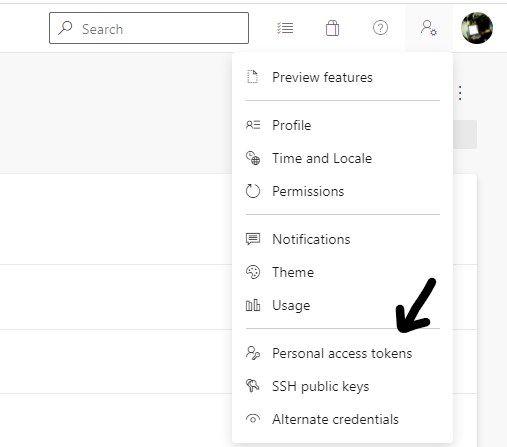
You can specify the expiration of the token along with the access permissions. For the simplicity of deployment I gave it full access. You will need to copy the token somewhere as it will not be accessible after the creation.

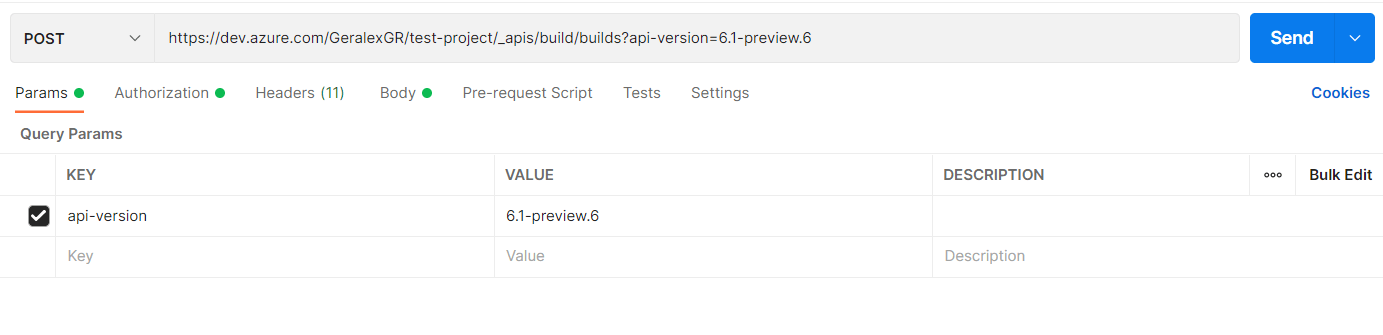
In order to trigger a new build we would have to use the POST HTTP verb. Along with that we will need the repository name, the project name and the build pipeline ID. The below URL uses build API of version 6.1-preview.6 with the parameters

Organization: GeralexGR
Project: test-project

https://dev.azure.com/GeralexGR/test-project/_apis/build/builds?api-version=6.1-preview.6

Using CURL we can get information of runs for a specific pipeline. For example in order to get the latest runs for pipeline with ID:11. In the below example you should replace PAT with your provisioned personal access token.

curl  --user '':'PAT' --header "Content-Type: application/json" --header "Accept:application/json" https://dev.azure.com/GeralexGR/test-project/_apis/pipelines/11/runs?api-version=6.1-preview.1

In order to implement a run of a build pipeline using REST APIs I will use Postman.

The selected verb is POST and the URL is the one mentioned above. By giving the URL on the input field, POSTMAN will automatically enumerate Query parameters.

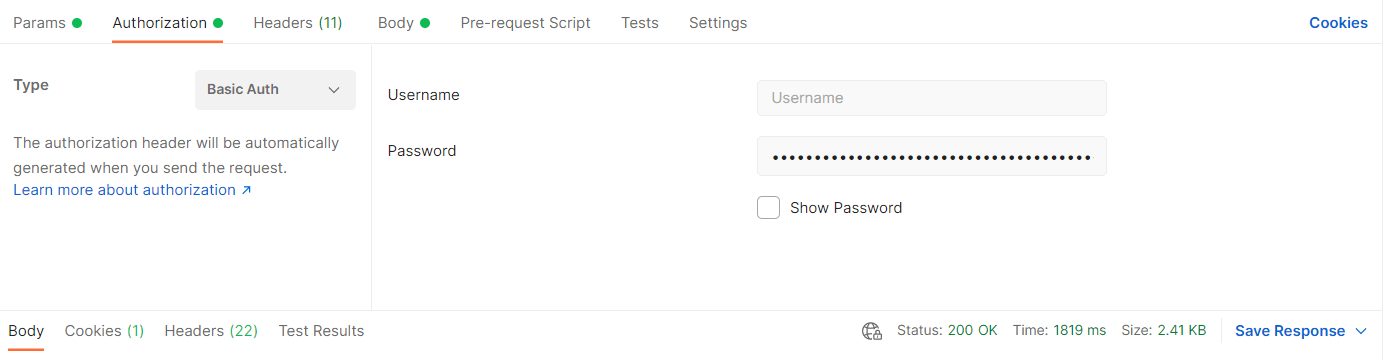
In Authorization tab you should select Basic Auth. The username can be empty and the password will be your PAT.

On Headers tab, add Content-Type as application/json

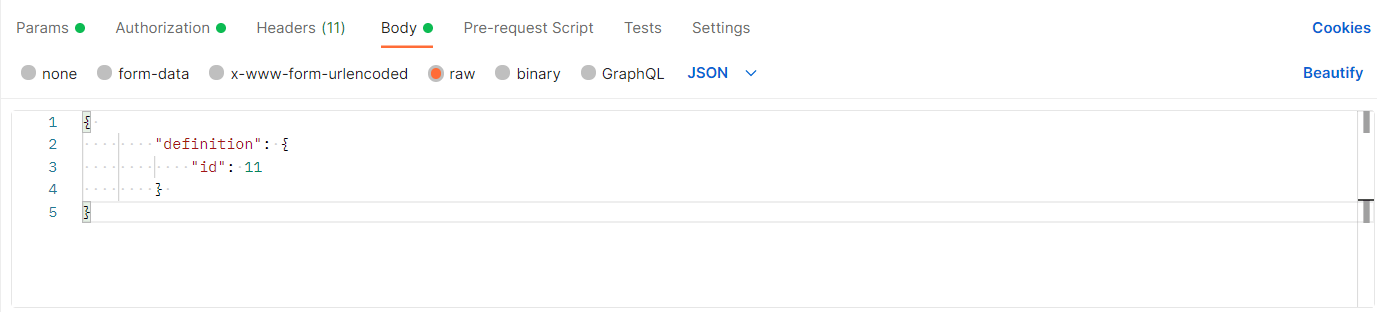
In the body, you should specify the build pipeline ID in the JSON format that is shown in the picture. If you press Send, you will successful trigger your build pipeline with ID 11.

The next step is to edit the pipeline to include also input parameters.

In order to do that, I will use the latest version of the REST API that uses the runs URL instead of builds.

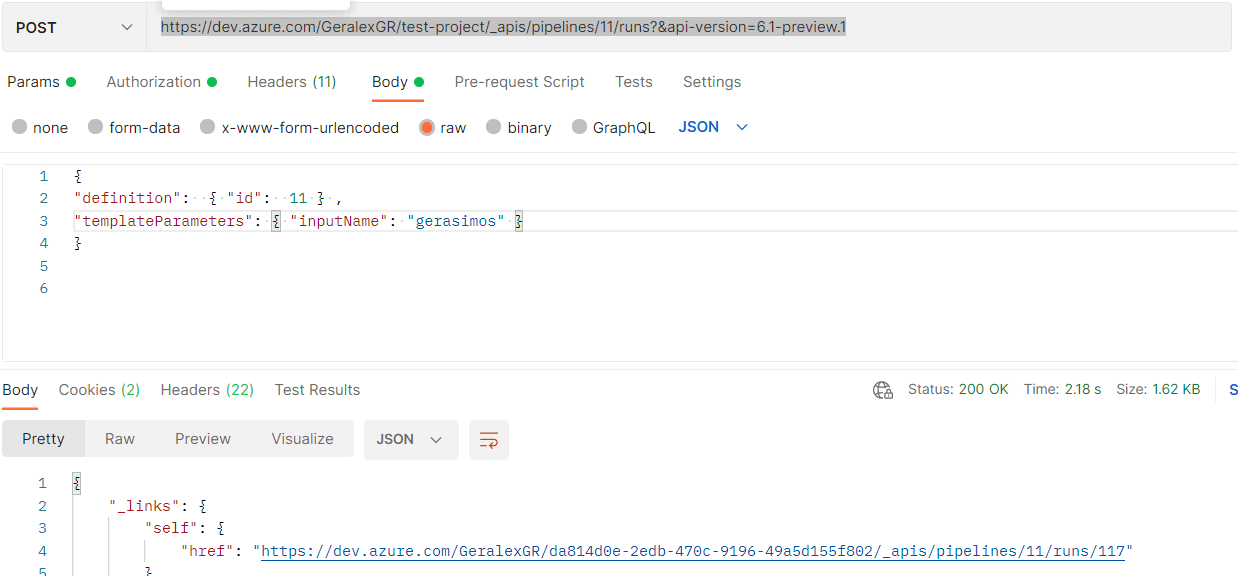
As shown in the picture the request URL will be pipelines/buildID/runs

https://dev.azure.com/GeralexGR/test-project/_apis/pipelines/11/runs?&api-version=6.1-preview.1

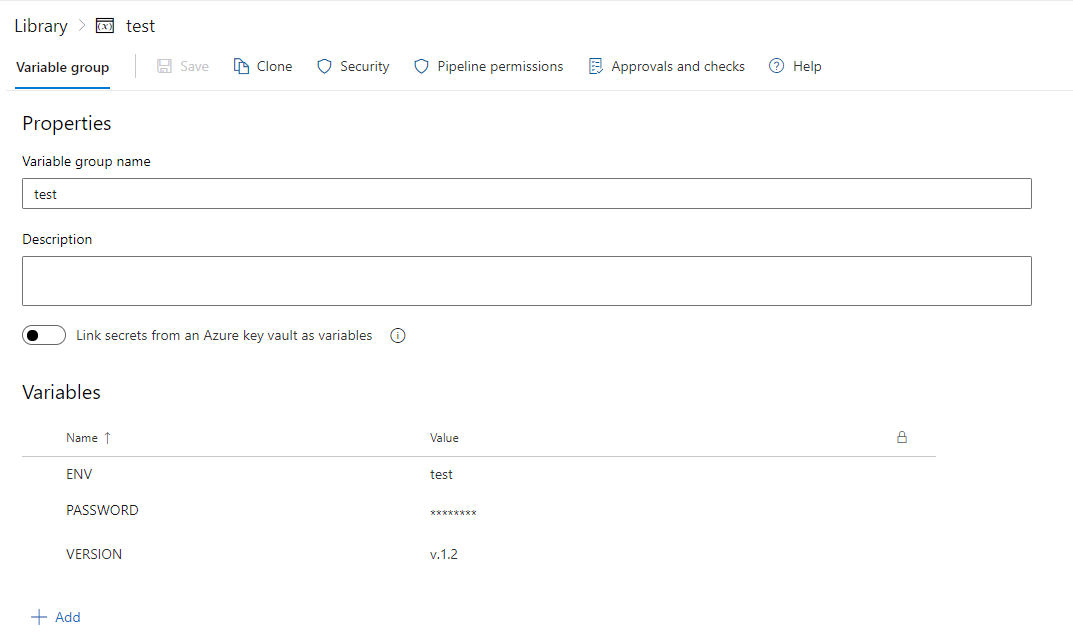
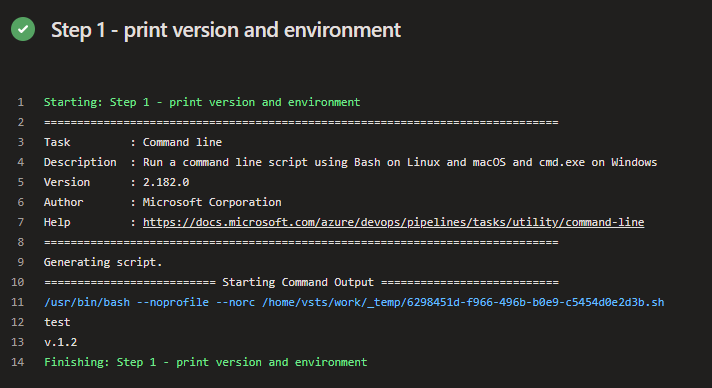
The logic of the pipeline will only print the parameters that has been provided as input on the REST API.

trigger:
- none

pr: none 

pool:
  vmImage: ubuntu-latest

parameters:
  - name: name
    displayName: Tell me your name.
    type: string
    
steps:
- script: echo ${{parameters.name}} "succesfully triggered this build from a REST API call"
  displayName: 'print message from automatically created pipeline'

You can see in the result that my name is printed.

Azure Devops Rest API documentation:

https://docs.microsoft.com/en-us/rest/api/azure/devops/pipelines/runs/run-pipeline?view=azure-devops-rest-6.0

Youtube video:

Posted on Leave a comment

Connect to power platform – Azure Devops pipelines

In this article I will explain how to create a Power platform environment and connect on it through Azure Devops pipelines. Power platform is a low code environment provided by Microsoft that can implement services and functionality quickly with a GUI.

In order to follow the tutorial you will need an Azure subscription and a power platform subscription which will be connected.

First things first, you should create a power platform environment. You can do this, by logging in the Power Platform admin center and pressing the New button.

Then you should select the type and region and also the database connection. I chose a sample database so that I get automatically data to test.

By choosing the trial subscription the environment only works for 30 days. This is good enough for the purposes of this article but not for production environments. After the provision of the environment you will get the environment URL and also some sessions details that will be needed for Azure devops.

You can find the sessions details on the right upper corner.

The you will need to create an app registration on your Azure subscription.

Press New registration

Give a name and select which accounts could access this application.

After the provision of the application, you will have to set the API permissions. Select Dynamics CRM -> User impersonation

Then you will have to create a secret for the application. Go to certificates and secrets and create a new client secret. Copy the value, as it will be needed later.

On Azure Devops you should create a service connection. Go to project settings -> Service connections and add a new connection. Select power platform on the connection type.

You should then add the connection details gathered on previous steps. Client secret and application ID from the Azure application that you created. The server URL and tenant ID can be gathered from power platform admin center.

Then go and create a new Pipeline on Azure Devops and add the below two steps. The power platform tools installer is required any time you want to connect on power platform. This will instruct the build agent to download the necessary tools for the deployment. The WhoAmI task will authenticate with the instance and verify if the connection is working.

Edit the WhoAmI step and include the service connection

Check the result of the task, as it should be successful (Green)

Posted on Leave a comment

Deploy between different environments with variable groups – Azure DevOps

Group variables is a functionality provided by Azure pipelines that let one handle a lot of variables as one entity. It also supports key vault integration but also secrets on comparison with the standard pipeline variables which should not be used as secrets according to Microsoft, as their value can be seen.

https://docs.microsoft.com/en-us/azure/devops/pipelines/library/variable-groups?view=azure-devops&tabs=yaml

In this article I will describe how you can use variable groups for different deployments based on the environment you work. For example the company may want to differentiate the variables for a product on the test and production version. This could be injected and handled on the pipeline accordingly with group variables and parameters.

This article refers to a product which has the same variables (version, password, environment) on test and prod, but their values are different.

In order to create a variable group you should go to Pipelines -> Library -> +Variable group.

The values which I provided on prod variable group are below:

Accordingly the same values exist for test.

The pipeline will trigger when a commit is merged on the main branch.

trigger:
- main

parameters:
  - name: environment
    displayName: Where to deploy?
    type: string
    default: test
    values:
    - prod
    - test


pool:
  vmImage: ubuntu-latest

variables:
 - group: ${{parameters.environment}}

steps:

- script: |
    echo $(ENV)
    echo $(VERSION)
  displayName: Step 1 - print version and environment

- script: echo $(PASSWORD)
  displayName: Step 2 - print secret

- script: pwd ENV ${{parameters.environment}}
  displayName: Step 3 - print parameter


By running the pipeline the type of environment will be asked

Depending on the selected input, the group variables of the specific category will be printed. If I run with test as input then I will get the test version and env variable.

Posted on Leave a comment

Deploy wordpress with mysql in less than a minute using docker containers

For testing purposes I had to deploy a wordpress installation and perform some work. As the standalone installation with wamp/mamp/xampp software would require time, I chose docker and containers for the deployment.

You can use the below docker-compose.yml file and have a working site stack in less than a minute.

version: '3.1'

services:

  wordpress:
    image: wordpress
    restart: always
    ports:
      - 8080:80
    environment:
      WORDPRESS_DB_HOST: host.docker.internal
      WORDPRESS_DB_USER: root
      WORDPRESS_DB_PASSWORD: password
      WORDPRESS_DB_NAME: wordpress
    volumes:
      - wordpress:/var/www/html

  db:
    image: mysql:latest
    restart: always
    environment:
      MYSQL_DATABASE: wordpress
      MYSQL_USER: user1
      MYSQL_PASSWORD: password
      MYSQL_ROOT_PASSWORD: password
    ports:
      - 3306:3306
    volumes:
      - db:/var/lib/mysql

volumes:
  wordpress:
  db:

You can run the above composer file with:

docker compose up -d

In order to access the new wordpress installation you should go to 0.0.0.0:8080 or localhost:8080

You can clone the code from the below repository:

https://github.com/geralexgr/wordpress-mysql-containers/