Posted on Leave a comment

Multi threading in powershell

Multi threading can save you a lot of time when you process multiple multiple jobs at the same time. Powershell is a very advanced scripting tool and there are a lot of things that can be implemented with it. As a result in many occasions you will need to do things in parallel so that you have a quicker execution.

Lets examine a simple scenario on how we can use multi threading on powershell. We will use the Test-Connection method which sends ICMP echo request packets, or pings, to one or more computers. We will use the below three domains and we will try to execute a test connection to all of them.

$computers = @("google.gr","microsoft.com","facebook.com")

In order to calculate the time that this operation needs we will use the StopWatch class.

$watch = New-Object System.Diagnostics.Stopwatch; 
$watch.Start(); 
foreach ($item in $computers) { test-connection $item; }; 
echo "Elapsed time:" $watch.Elapsed.TotalSeconds;

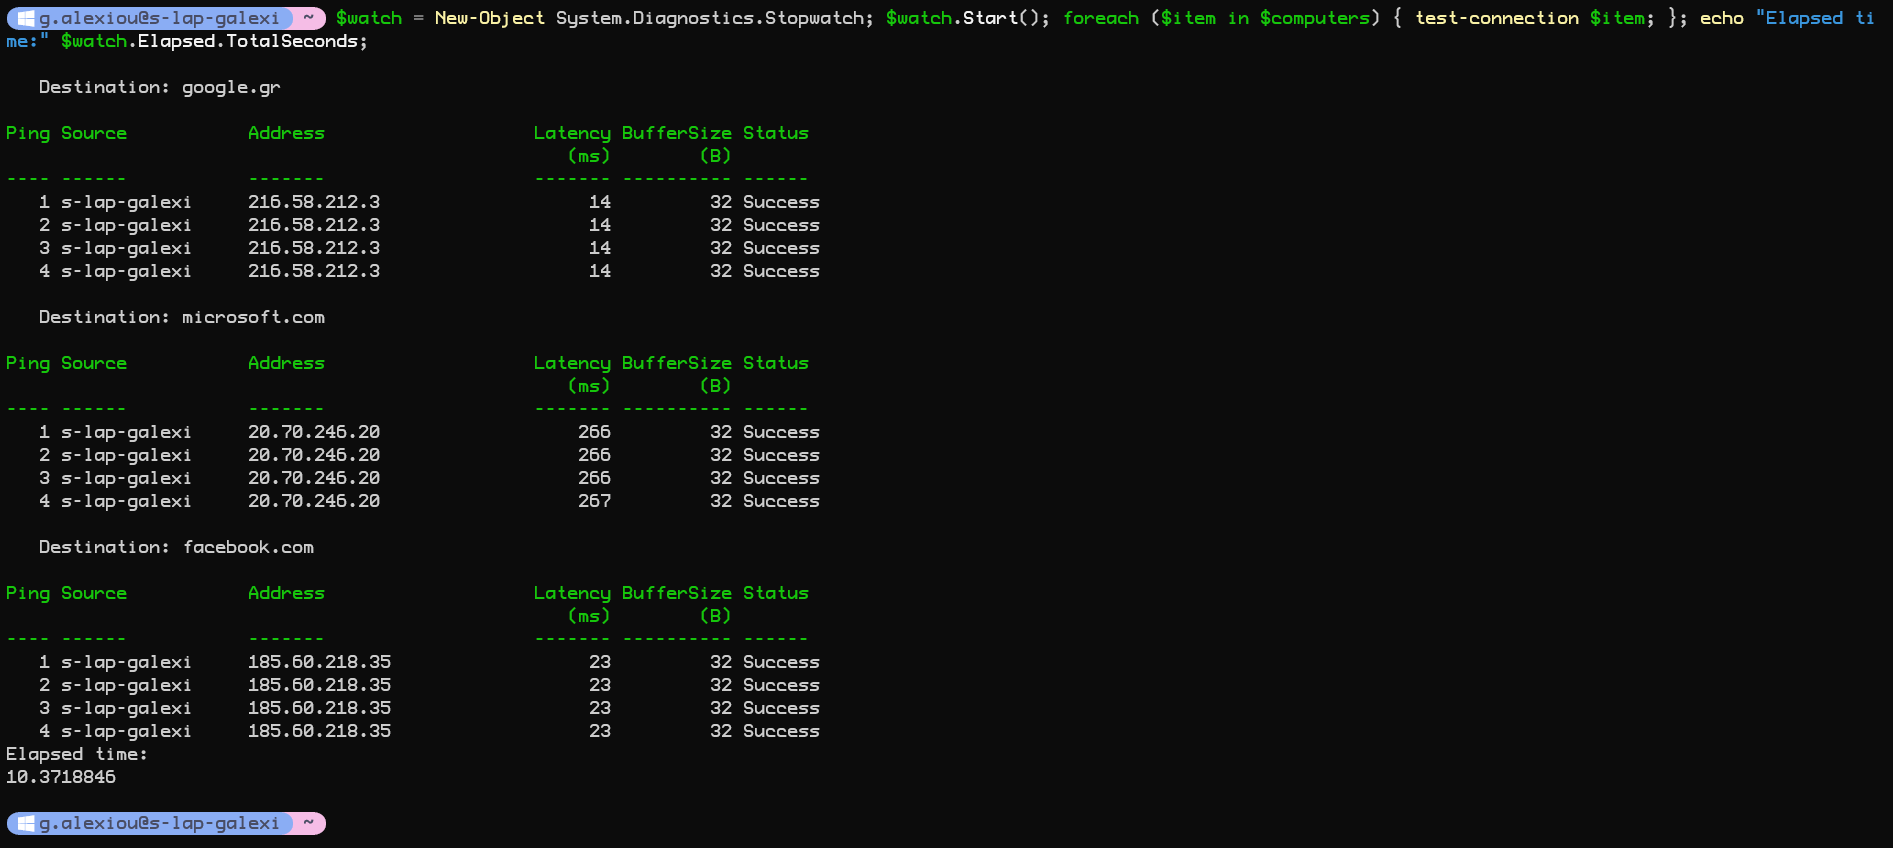
The total Elapsed Time for this operation to complete would be around 10 seconds by performing the actions serially.

Lets examine how could we could use multi threading in order to complete this operation faster. In powershell v7 you can use the ForEach-Object with Parallel parameter. An example can be found below. This operation will be executed in parallel by multiple threads.

$watch = New-Object System.Diagnostics.Stopwatch;  
$watch.Start(); 
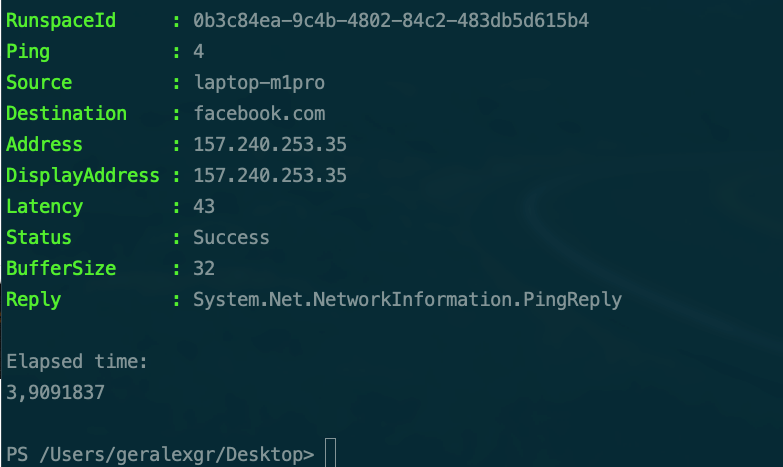
$computers | ForEach-Object -Parallel {test-connection $_} -AsJob | Receive-Job -Wait ; 
echo "Elapsed time:" $watch.Elapsed.TotalSeconds;

The result for this execution would be 3.8 seconds which means that we have 6 seconds less execution time or about 2.5 times faster.

If we use powershell v5 we can implement multi threading with the Start-Job. By using that we will need to write our logic inside the ScriptBlock.

$watch = New-Object System.Diagnostics.Stopwatch; 
$watch.Start(); 
$job1 = Start-Job -ScriptBlock { test-connection -ComputerName "google.gr" }
$job2 = Start-Job -ScriptBlock { test-connection -ComputerName "microsoft.com" }
$job3 = Start-Job -ScriptBlock { test-connection -ComputerName "facebook.com" }

Get-Job | Wait-Job

Receive-Job $job1
Receive-Job $job2
Receive-Job $job3

echo "Elapsed time:" $watch.Elapsed.TotalSeconds;

As we can see the execution time is about 3,9 seconds which is close enough with the time of powershell 7 script.

Youtube video:

Posted on Leave a comment

Get standard error output from command on powershell

There could be times that you will need to get the standard output from a script or command in powershell and handle this information. An example that I use is the output of docker info which I use to monitor the service state along with other things. The output of the docker info will inform you about an error during connection if the engine is not working. In the latest version of docker they changed the way message is displayed and this information will be printed on standard error instead of standard output.

docker info

As a result when you try to find the connection state through a powershell command you will fail identifying the correct state.

 (docker info).Contains('ERROR: error during connect')

This behavior is noticed because the error is printed on standard error.

In order to bypass and get the standard error on the output, you will need to use 2>&1 along with the command.

docker info 2>&1 

After that you can handle the output message appropriately.

Posted on 2 Comments

Downgrade docker by installing an older version on linux

Sometimes the latest version of software may include bugs that have not been fixed.This is the case for docker on Ubuntu 22.04. The buildkit version prints on stderr instead of stdout and this causes some issues on teamcity. As a solution I wanted to downgrade docker on a previous version. First you will need to delete the existing docker installation. You can do this with the below commands:

sudo apt-get purge -y docker-engine docker docker.io docker-ce docker-ce-cli docker-compose-plugin
sudo apt-get autoremove -y --purge docker-engine docker docker.io docker-ce docker-compose-plugin

sudo rm -rf /var/lib/docker /etc/docker
sudo rm /etc/apparmor.d/docker
sudo groupdel docker
sudo rm -rf /var/run/docker.sock

Based on your OS version you can go under docker downloads and find a specific version. Some older docker version exist for older OS versions but you can install them on later versions also.

Index of linux/ubuntu/dists/ (docker.com)

There could be a case when you have jammy (22.04) but you want to install binaries that were available on bionic version (18.04). In order to install an older version of docker you will need to download the old binaries by navigating inside the specific version then selecting pool and finally stable. Inside the last folder you can find all the architectures that are supported and you should select the appropriate one. For x64 you can select amd64 and then you can find a specific version of the binary.

In order to install specific version you will need to download all the packages that you need (some of them are dependencies of docker-ce) with wget and then install them.

Download:

wget https://download.docker.com/linux/ubuntu/dists/bionic/pool/stable/amd64/docker-scan-plugin_0.17.0~ubuntu-bionic_amd64.deb

Install:

dpkg -i docker-scan-plugin_0.17.0~ubuntu-bionic_amd64.deb
Posted on Leave a comment

Azure Keyvault Managed Identity C#

In the below .NET 6 example you can find how to get secrets from a keyvault using Managed Identity in order to secure communication between resources.

There are two packages required for this accomplishment.

https://www.nuget.org/packages/Azure.Identity

https://www.nuget.org/packages/Azure.Security.KeyVault.Secrets

Code:

using Azure.Identity;
using Azure.Security.KeyVault.Secrets;

const string managedIdentityIdentifier = "Id";
const string secretName = "secretName";
const string keyVaultUrl = "Url";

var client = new SecretClient(vaultUri: new Uri(keyVaultUrl), credential: new ManagedIdentityCredential(managedIdentityIdentifier));
var secret = client.GetSecret(secretName);

Console.WriteLine("retrieving secret value using managed identity: " + secret.Value.Value);