When you try to build a .NET6 solution using .NET7 as the latest installed version of SDK you may notice the below issue.
C:\Program Files\dotnet\sdk\7.0.302\Sdks\Microsoft.NET.Sdk\targets\Microsoft.NET.Sdk.FrameworkReferenceResolution.targets(376,5): error NETSDK1127: The targeting pack Microsoft.NETCore.App is not installed. Please restore and try again.
This issue is related to some variables that are not set properly and the right location for the tools cannot be determined although they are installed inside the operating system.
The task is using the default .NET runner of Teamcity and the default MSbuild version is set to Cross-platform MSBuild.
Switch to another version of MSBuild will most probably resolve the issue. For example in the setup I was working switching to MSBuild Tools 2022 removed the issue and build could be performed successfully.
When you build your application with cloud native technologies you will build microservices on containers instead of monolithic applications. We will now examine how easy is to build a .NET application in a container and run this application on your local machine.
First we will need to create the visual studio solution. I will go through that with visual studio IDE and then I will use vs code. For my microservice I am using a ASP .NET Core web api with default code.
The target framework for the solution will be the latest .NET framework which is version 7. All other settings will be set to defaults.
When you run the app locally with IIsExpress you will be able to access the swagger interface through the port which you defined in the launchSettings.json.
This file can be located under Properties and there you can configure on which port the application will run. In the profiles section under https settings, you can find the default application URL and port. This will be needed in later steps.
Microsoft provides the below documentation in order to create a containerized application that runs on .NET
In order to create a microservice based on our vs solution we will need a dockerfile. This can be created automatically with vs code.
In vs code command dialog search for docker add and select docker compose files to workspace.
Then select asp net core.
and after that your operating system. The next step will be to select the exposed port, or otherwise under which port your application will run. There we should provide the port that we found under our launchSettings.json or the one that we configured manually. In my case I will select the default one for the solution which was 7057.
When a popup window appears on the screen you should select add Dockerfile and automatically the build files will be generated.
Dockerfile
Based on my setup I altered two things in the generated Dockerfile. The first thing will be to change configuration to Debug instead of Release. For production environments you will consider using the release build directive. The second thing will be to add an environmental variable ASPNETCORE_ENVIRONMENT inside the container with the value Development.
FROM mcr.microsoft.com/dotnet/aspnet:7.0 AS base WORKDIR /app EXPOSE 7057
FROM mcr.microsoft.com/dotnet/sdk:7.0 AS build WORKDIR /src COPY ["AspNetWebApi.csproj", "./"] RUN dotnet restore "AspNetWebApi.csproj" COPY . . WORKDIR "/src/." RUN dotnet build "AspNetWebApi.csproj" -c Debug -o /app/build
FROM build AS publish RUN dotnet publish "AspNetWebApi.csproj" -c Debug -o /app/publish /p:UseAppHost=false
FROM base AS final WORKDIR /app COPY --from=publish /app/publish . ENTRYPOINT ["dotnet", "AspNetWebApi.dll"]
docker build command
after the build is completed and the image is created you can run a new container locally.
Keep in mind that in order to test your container you should create a port forward from the container to your host. I used the same port for the host so I added the -p 7057:7057
The logs of the container indicate a successful run of the application.
Our application now runs as a microservice container inside the host machine (my laptop).
We can verify the access to our application using the URL with the swagger.
When you try to push a nuget package from a DevOps pipeline on Artifacts feed you may face the below error.
##[error]Error: An unexpected error occurred while trying to push the package with VstsNuGetPush.exe. Exit code(1) and error(Error:
Microsoft.VisualStudio.Services.Common.VssServiceException: User 'xxx' lacks permission to complete this action. You need to have 'ReadPackages'
This error could be resolved by editing the settings of the feed.
In more detail under permissions you can find which users or service account can perform actions based on their role.
By default I could locate the Project Collection Build Service (Organization) with the Contributor permissions but did not work. As a solution I removed that and added "Project Name" Build Service (Organization). This is the build service for the project on which I have created the pipeline specifically.
In this article I will demonstrate how you can write a simple .NET console application to write data inside a blob container on an Azure storage account.
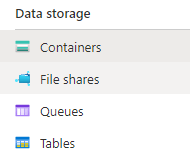
Storage accounts support the below four data structures.
For the cases of an application, I had to write every x seconds data on a file in order to get the coordinates of an app. For this purpose I selected a storage account container on which I will store the Latitude and Longitude in a .json format.
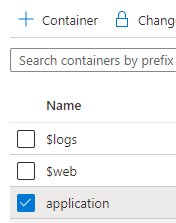
Inside my storage account I created a container which I will use named application.
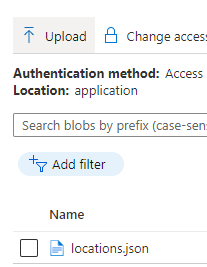
Inside application container I created a file named locations.json. This will be the file that will get updated from the mobile app.
My console app consists of two .cs files. One is the location class which will be my model for the serialization.
   public class Location
    {
        public Double Latitude { get; set; }
        public Double Longitude { get; set; }
    }
And the main code which consists of two functions. The RetrieveBlobContents function can read the stream content of a requested file from the blob. As I have specific names for my scenario, I hard coded them on the application. My containerName is application and the file which I want to read is called locations.json
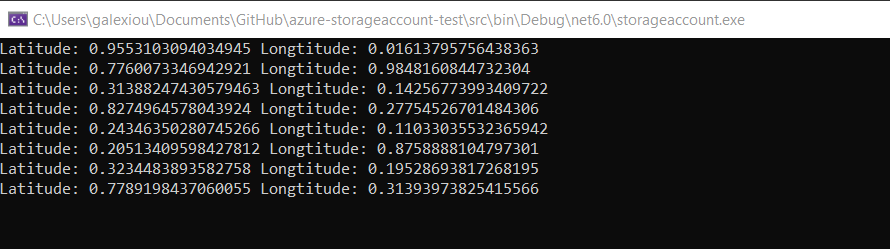
The WriteContentOnBlob function will serialize a random Location object and will update the file every 5 seconds. The result is accomplished by writing a file locally and pushing this local file on the blob storage. The content of the file will be first extracted on the current directory/data folder.
Program.cs
This file contains hidden or bidirectional Unicode text that may be interpreted or compiled differently than what appears below. To review, open the file in an editor that reveals hidden Unicode characters.
Learn more about bidirectional Unicode characters