Posted on 2 Comments

Run jobs with containers on Azure batch service

Azure Batch can be a great tool for instant batch processing as it creates and manages a pool of compute nodes (virtual machines), installs the applications you want to run, and schedules jobs to run on the nodes. Sometimes however a container could be a more appropriate solution for simplicity and scaling than a virtual machine. In this guide I will explain how you could use containers for batch service in order to run jobs and tasks.

Use the Azure Compute Gallery to create a custom image pool – Azure Batch | Microsoft Learn

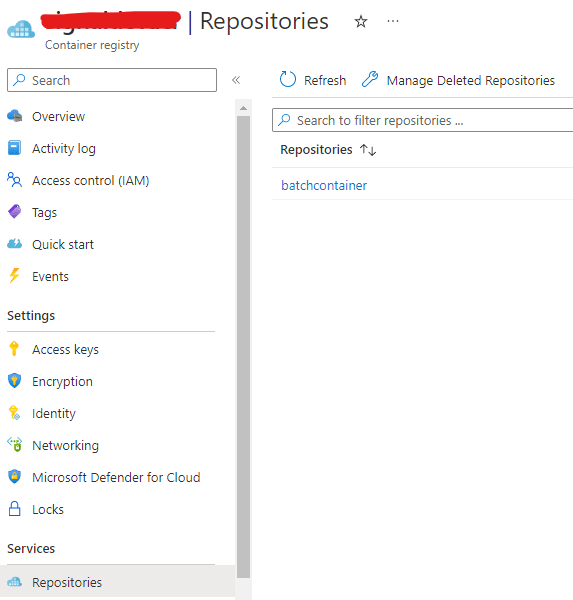
First things first, you will need to have a azure container registry or another public or private registry to store your container image. I have already created mine and pushed my batchcontainer image inside which is a .NET micro service that returns a hello world message as an output.

using System;

namespace samplebatch
{
    internal class Program
    {
        static void Main(string[] args)
        {
            Console.WriteLine($"Hello {args[0]}");
        }
    }
}

https://github.com/geralexgr/samplebatch

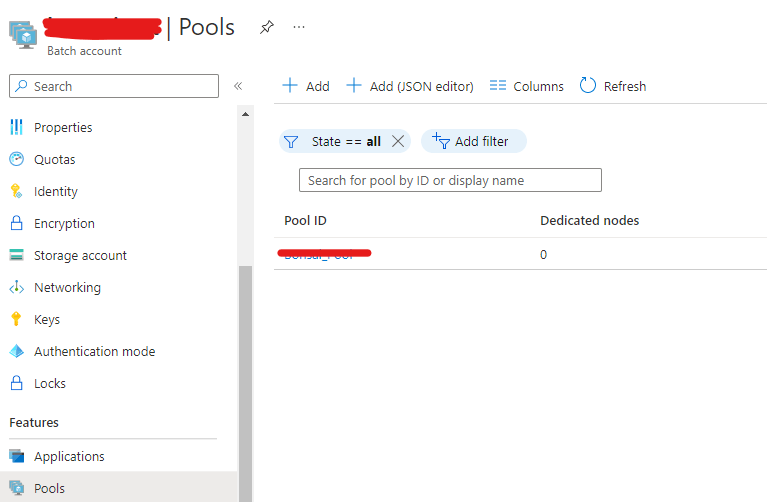
The next step would be to create your batch service account. The part on which you set your container as the workload is when you create a pool. Pools consist of the compute node that will execute your jobs and there you will add a new pool which will host containers from the image that you pushed earlier.

On the node selection you will have to select Marketplace on the Image type and specifically microsoft-azure-batch and ubuntu-server-container of 20-04-lts version. Then you will need to select Custom on the container configuration and add your container registry by pressing the hyperlink.

selection of custom container image on the batch service

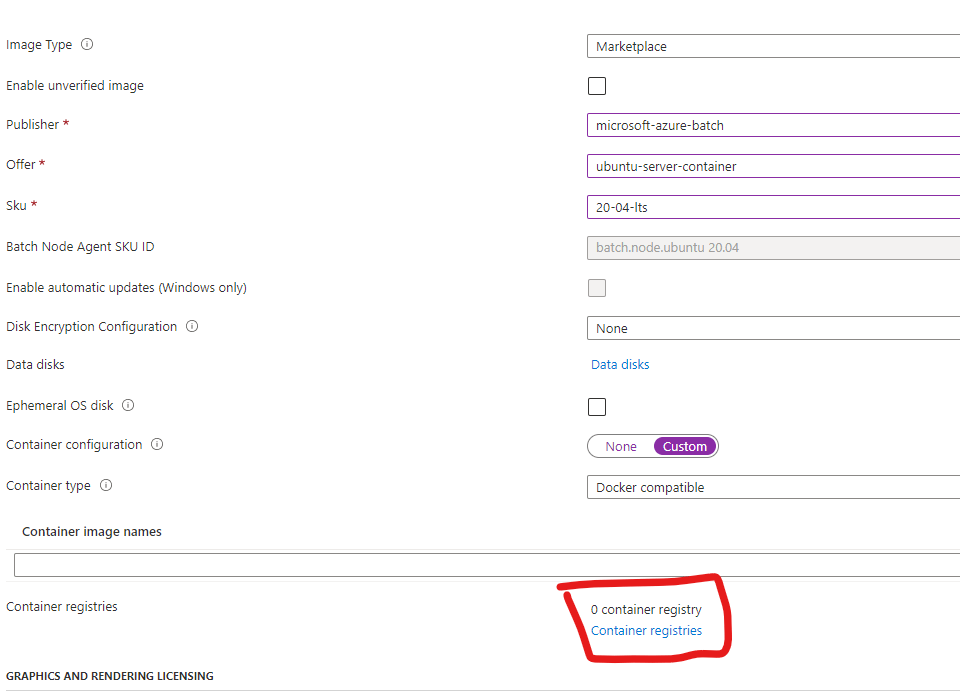
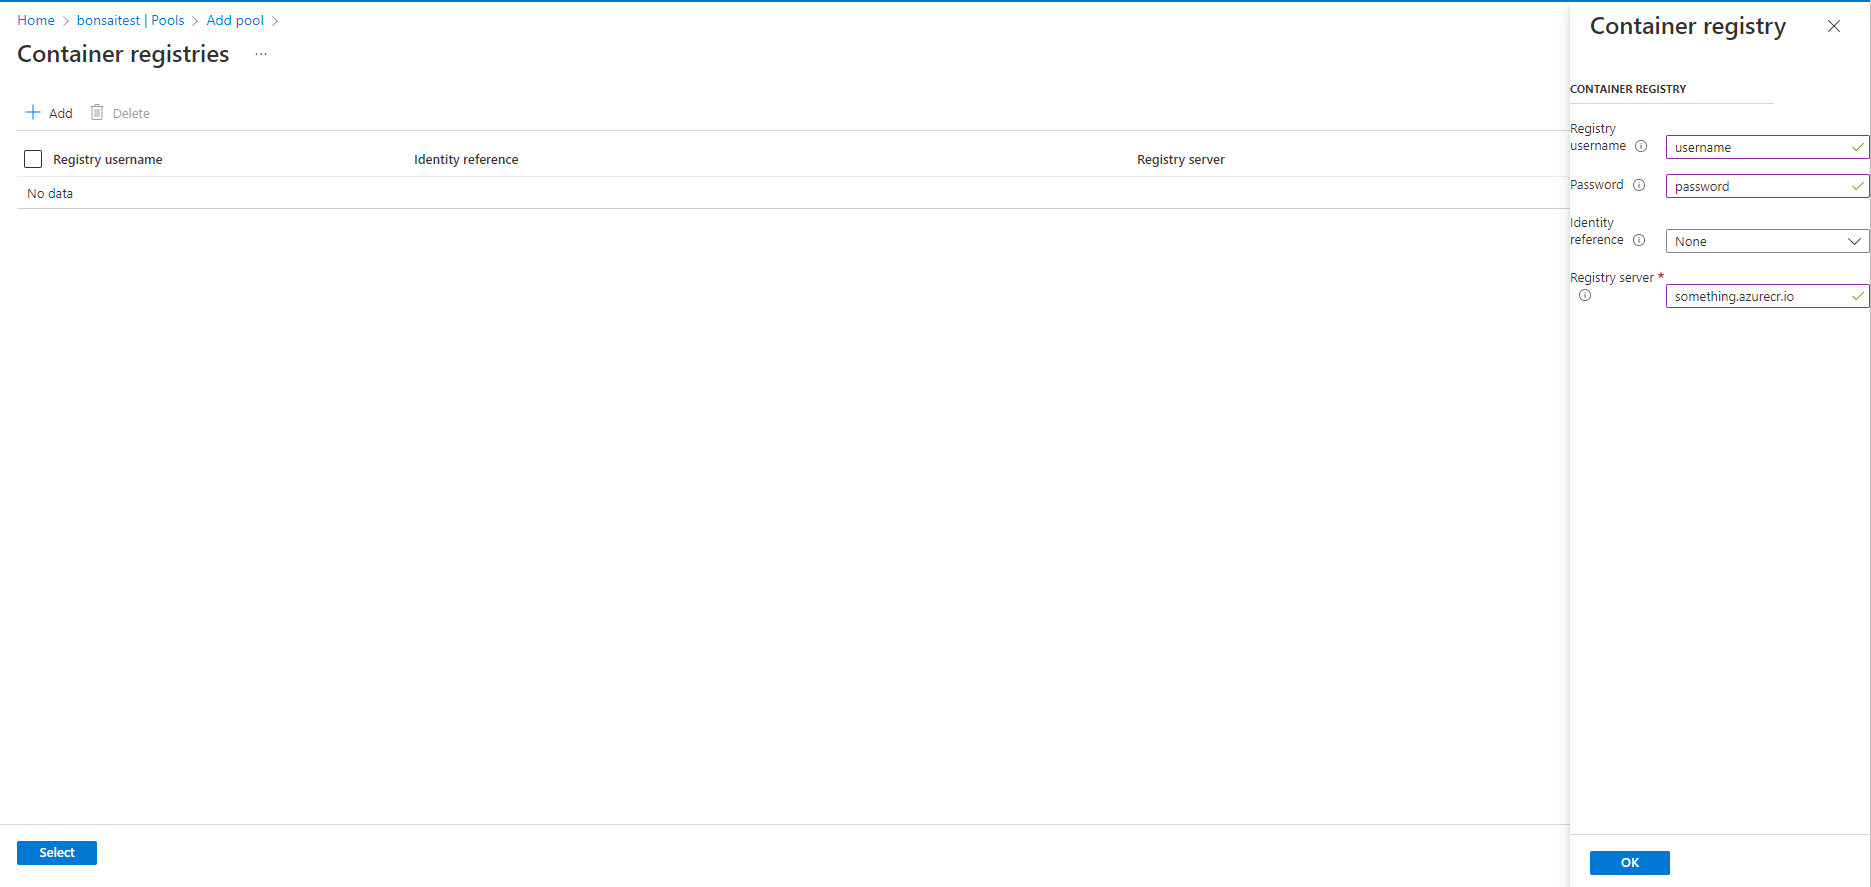
Then you will need to input the username and password for the container registry as well as the registry URL.

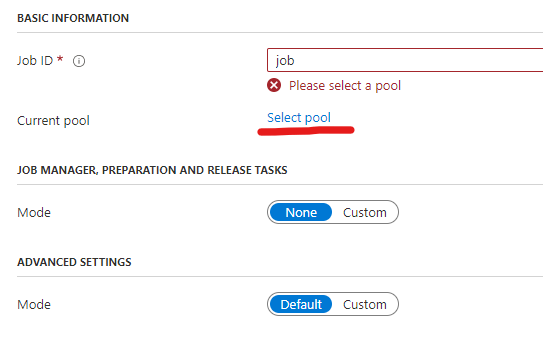
When you have your pool ready you can go and create your job. You can leave the default settings on the job creation but you should specify the pool where the job will run.

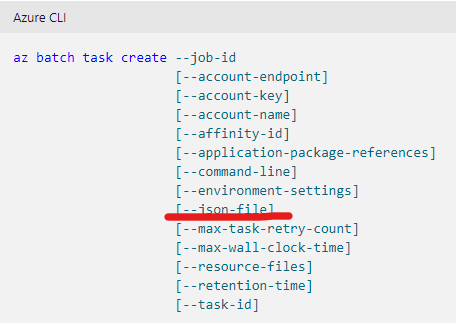
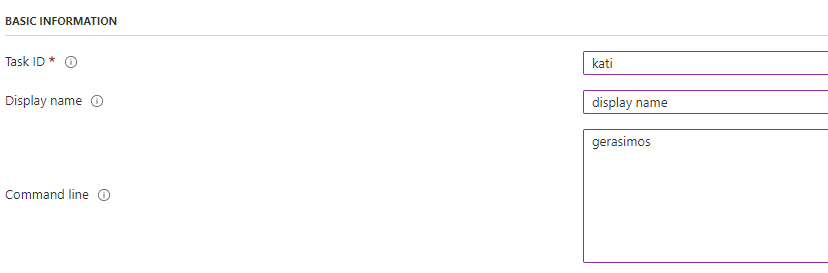
Then you can create a task or multiple tasks for your job and provide the commands or inputs for them. In my case I created a task named kati with the command of my name. This will be provided as input in my container which is a .NET microservice that prints a hello world message based on the input.

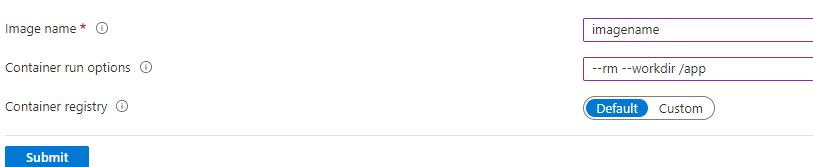
The important thing to do is to fill the image name from your repository. You can also provide container run options that you want for this node to have like mount of directories etc.

Example: repo.azurecr.io/batchservice:latest

As a result the output would be Hello gerasimos

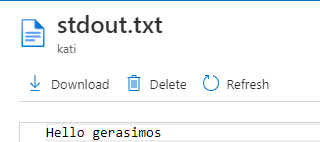
The output of the run can be found on the stdout.txt file which is located on the task pane. You can also find a stderr.txt file which will log errors/failures that could appear during the execution.

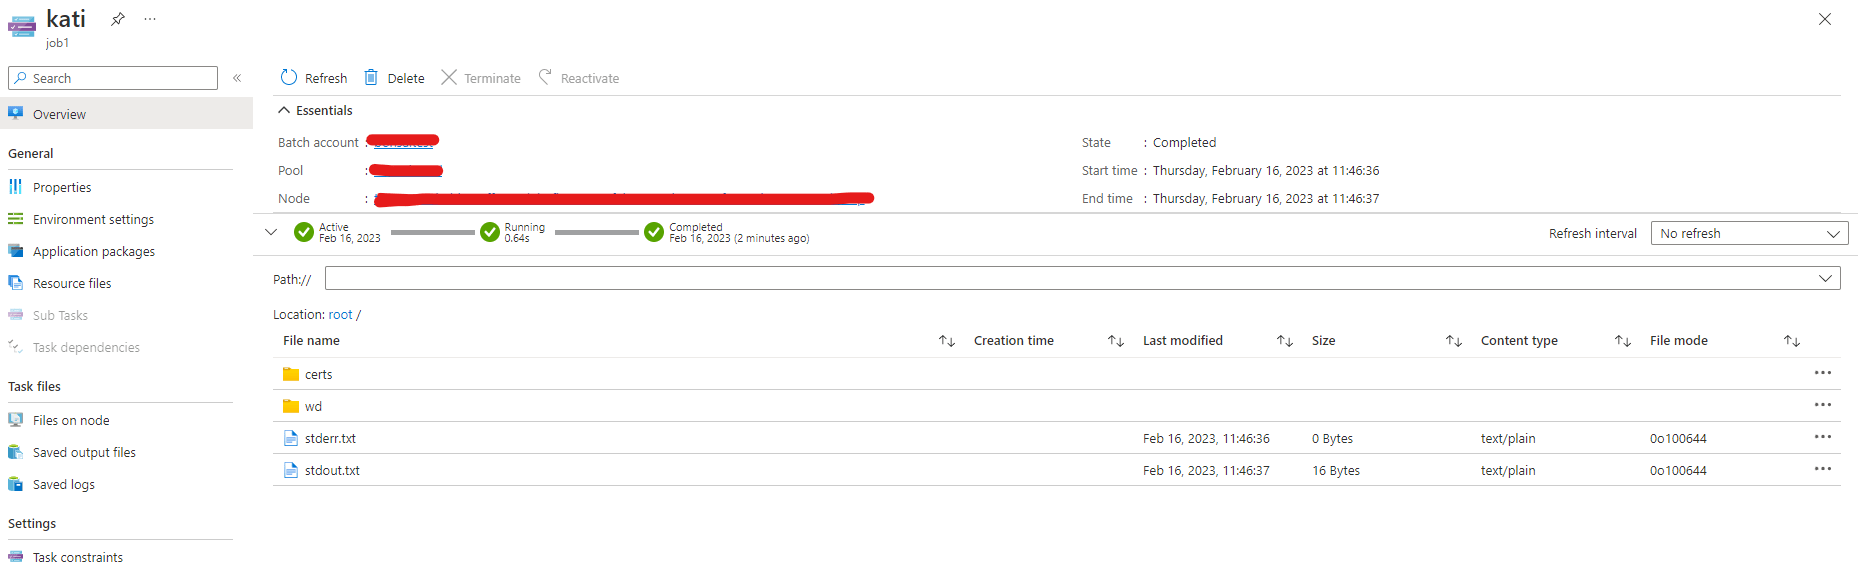
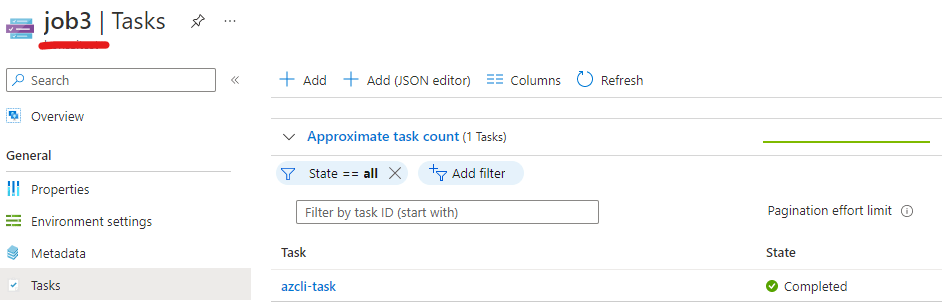
Lastly, you can locate your job execution by navigating in the nodes where you can find a history of your tasks. As you can see I have two successful task executions and non failed.

YouTube video:

Posted on Leave a comment

Azure batch run task with container image through az cli and json rest api

Azure Batch can be a great tool for instant batch processing as it creates and manages a pool of compute nodes (virtual machines), installs the applications you want to run, and schedules jobs to run on the nodes. The important thing using this service is that there is no additional charge for using Batch. You only pay for the underlying resources consumed, such as the virtual machines, storage, and networking.

Azure Batch documentation – Azure Batch | Microsoft Learn

In this post I will demonstrate how one can create a new job and task from az cli for batch service. The trick in this implementation will be the json that is provided as input for the task definition as not all available options are provided from az cli.

The available az cli options are shown below.

https://learn.microsoft.com/en-us/cli/azure/batch/task?view=azure-cli-latest#az-batch-task-create

One important missing configuration will be the container image that can be provided in the task trough Azure portal but not with az cli.

In order to create a task using az cli and bypass this issue, you can use the json-file parameter. This option will trigger the creation using the rest api and provide the parameters for the container image.

When there is a batch service pool available, you will need to create a job.

az batch account login -g RESOURCE_GROUP -n NAME
az batch job create --id JOB_NAME --pool-id POOL_NAME

Then you can create a new task using a json file.

az batch task create --job-id JOB_NAME --json-file

Task – Add – REST API (Azure Batch Service) | Microsoft Learn

The JSON file can be created as shown below.

{   
  "id": "azcli-task",
  "displayName": "azcli-task",
  "commandLine": "azcli-task",
  "containerSettings": {
    "containerRunOptions": "--rm --workdir /app",
    "imageName": "registry.azurecr.io/batchcontainer"
  }
}

When you execute the command you will get an output from the rest API for the created task.

output omitted

Finally you can find the new created task on Azure portal.

Posted on 10 Comments

Pass variables values inside terraform modules

In this article I will explain two different ways to pass variables values inside terraform modules. Modules let you separate your code into small units and help the engineer structure its project better.

https://www.terraform.io/language/modules/syntax

Modules in terraform (terraform files) can be placed on folders and their location should be provided on the module directive. Lets say for example that you host a main.tf on your current working directory which should call two modules. The first module would be a storage account and the second would be an app service. Your main.tf file should look like below.

module "app_service_test" {
  source                  = "./modules/appservice"
}
module "storage_account_test" {
  source                  = "./modules/storageaccount"
}

However you want to pass some variables inside the child modules for example the resource group name, location etc.

First method – Define variables on root module

The first way you can pass variables inside your child modules would be to define a variables.tf file on your main module and a terraform.tfvars. Then you should also define a variables.tf file inside each module and contain the definition of each module.

terraform.tfvars (root module)

app_service_plan_name   = "ger-plan-test"
app_service_name        = "ger-site-test"
resource_group_name     = "geralexgr-terraform-rg"
resource_group_location = "West Europe"
storage_account_name    = "geralexgrsgv2"

variables.tf (root module)

variable "storage_account_name" {
  type        = string
  description = "Storage account name"
  default     = ""
}

variable "resource_group_name" {
  type        = string
  description = "RG name in Azure"
}

variable "app_service_plan_name" {
  type        = string
  description = "App Service Plan name in Azure"
}

variable "app_service_name" {
  type        = string
  description = "Name for the app service"
}

variable "resource_group_location" {
  type        = string
  description = "RG location in Azure"
}

variables.tf (storageaccount module)

variable "storage_account_name" {
    type        = string
    description = "Storage account name"
}
variable "resource_group_name" {
    type        = string
    description = "RG name in Azure"
}

variable "resource_group_location" {
    type        = string
    description = "RG location in Azure"
}

variables.tf (appservice module)

variable "app_service_plan_name" {
    type        = string
    description = "App Service Plan name in Azure"
}

variable "app_service_name" {
    type = string
    description = "Name for the app service"
}
variable "resource_group_name" {
    type        = string
    description = "RG name in Azure"
}

variable "resource_group_location" {
    type        = string
    description = "RG location in Azure"
}

Then on your main module you should call your child modules as follows:

module "app_service_test" {
  source                  = "./modules/appservice"
  app_service_plan_name   = var.app_service_plan_name
  app_service_name        = var.app_service_name
  resource_group_name     = var.resource_group_name
  resource_group_location = var.resource_group_location
}

module "storage_account_test" {
  source                  = "./modules/storageaccount"
  storage_account_name    = var.storage_account_name
  resource_group_name     = var.resource_group_name
  resource_group_location = var.resource_group_location
}

Second method – Pass variables on module call

With this approach you do not need to have variables.tf file and terraform.tfvars file inside your root module. You only need the definition as described above inside appservice and storageaccount folders (variables.tf).

variables.tf (appservice module)

variable "app_service_plan_name" {
    type        = string
    description = "App Service Plan name in Azure"
}

variable "app_service_name" {
    type = string
    description = "Name for the app service"
}
variable "resource_group_name" {
    type        = string
    description = "RG name in Azure"
}

variable "resource_group_location" {
    type        = string
    description = "RG location in Azure"
}

variables.tf (storageaccount module)

variable "storage_account_name" {
    type        = string
    description = "Storage account name"
}
variable "resource_group_name" {
    type        = string
    description = "RG name in Azure"
}
variable "resource_group_location" {
    type        = string
    description = "RG location in Azure"
}

Then your main.tf file should be:

module "app_service_test" {
  source                  = "./modules/appservice"
  app_service_plan_name   = "ger-plan-test"
  app_service_name        = "ger-site-test"
  resource_group_location = "West Europe"
  resource_group_name     = "geralexgr-terraform-rg"
}

module "storage_account_test" {
  source                  = "./modules/storageaccount"
  storage_account_name    = "geralexgrsgv2"
  resource_group_name     = "geralexgr-terraform-rg"
  resource_group_location = "West Europe"
}
Posted on Leave a comment

Install linux azure devops agent on docker container

As we previously examined how we can create a containerized azure devops agent running on a windows machine, we will now go through the same procedure but with linux OS.

You can read the windows container azure devops agent article using the below link:

The first thing that you will need is a virtual machine that runs docker. When this requirement is fulfilled you can jump on the image building. In order to build your image you will need your Dockerfile and the instructions for the agent.

You can read the rest of the article on Medium using the link below:

A detailed deployment video can be found on my Udemy course:

https://www.udemy.com/course/mastering-azure-devops-cicd-pipelines-with-yaml/