Posted on Leave a comment

Push multiple docker container images using a loop – Azure DevOps

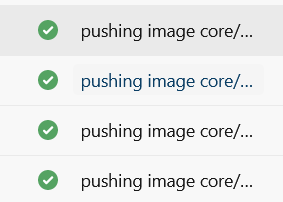
On a pipeline that I was creating I wanted to push multiple docker images on an Azure container registry based on a list. In order to do that I used the docker@2 task on a loop providing the images that I had to push as a parameter. Code is attached below.

trigger:
– none
pr: none
parameters:
– name: containerlist
type: object
default: ["core/image1","core/image2","core/image3","core/image4"]
– name: DockerPushID
type: string
pool:
name: demo-app
stages:
– stage: containers
displayName: Push containers to container registry $(registry)
jobs:
– job: pushcontainers
displayName: Push containers on testexample.azurecr.io
steps:
– checkout: none
– ${{ each container in parameters.containerlist }}:
– task: Docker@2
displayName: pushing image ${{container}}
inputs:
containerRegistry: 'registryconnection'
repository: '${{container}}'
command: 'push'
tags: |
current-${{parameters.DockerPushID}}
current-latest

This task will run steps based on the images you provide on the parameters list. An important note is that you need to have the image named accordingly in order to get a successful result. For example if you need to push on geralexgr.azurecr.io you will need to have your images named as below.

geralexgr.azurecr.io/image1:current-latest
geralexgr.azurecr.io/image2:current-latest

Else you may notice some failures indicating the below.

The push refers to repository [***/kati/image1] 
An image does not exist locally with the tag: ***/kati/image1

A successful run of the pipeline.

Additional information regarding loops and expressions on Azure DevOps pipelines:

https://docs.microsoft.com/en-us/azure/devops/pipelines/process/expressions?view=azure-devops#functions

Video tutorial on YouTube:

Posted on Leave a comment

Create multiple environments with Terraform modules – App service Azure example

In this article I will demonstrate how one can create different environments for development needs through terraform modules. Modules provide great extensibility and code reuse. In this example I will use an appservice resource on Azure cloud.

The result of the deployment will be two different resource groups with two app services. The code of the demonstration is located at the bottom of the page.

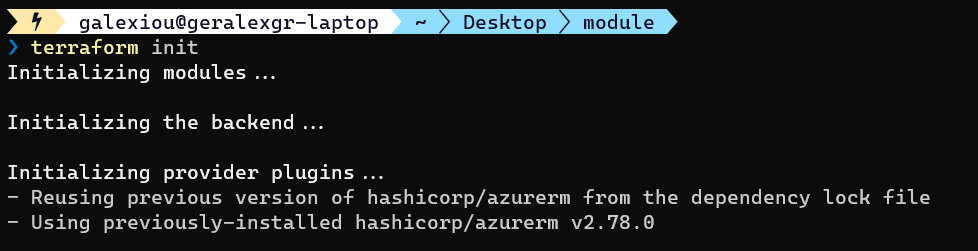
You should first init your module. Navigate to the module folder and perform init

cd modules; terraform init
cd .. ; terraform init

Then validate your terraform code

terraform validate

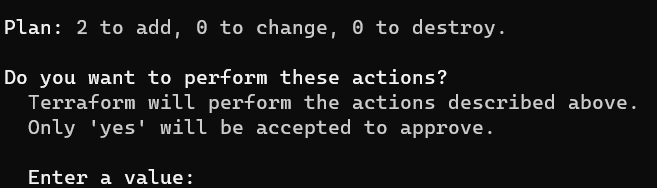
The last step is to apply your configuration

terraform apply

You may encounter an error during the creation of the resources because of the app service name. It should be globally unique.

Change your name and perform a terraform apply again. Terraform will read your .tfstate file and will only implement the differences on infrastructure.

After the successful run you will see the green result output from terraform cli.

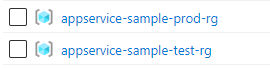
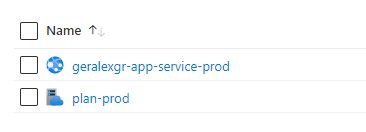
On Azure there should be two resource groups created. One for prod environment and one for test.

Inside each resource group there should be a different app service the one that it is created through the module according with the settings provided.

Production app service plan

GitHub repository:

https://github.com/geralexgr/terraform-module-environments-deploy

Video tutorial on YouTube:

Posted on 1 Comment

Deploy windows and linux virtual machines on Azure using terraform

Terraform is one of the best automation providers for DevOps purposes used by hundred of Engineers. It is an open source tool that can be used by anyone for free. In this article I will explain how to deploy windows and linux virtual machines on Azure using a Terraform template.

First things first you will need to have the az cli installed. Then you will have to set your subscription on your current powershell session.

az account set --subscription "12abc123-4567-1234-12345-asdr4334fsd"

Then you will need to create an app role assignment for your subscription. This will be used from terraform for the provision of the resources.

az ad sp create-for-rbac --role="Contributor" --scopes="/subscriptions/12abc123-4567-1234-12345-asdr4334fsd"

That’s all. You can now deploy your resources through terraform. In the links below I have provided my Github repository along with instructions for the template use.

A tricky part of the deployment is the vm image selection. In order to locate the available azure images names you can use:

az vm image list

Enumeration of available images:

[
  {
    "offer": "CentOS",
    "publisher": "OpenLogic",
    "sku": "7.5",
    "urn": "OpenLogic:CentOS:7.5:latest",
    "urnAlias": "CentOS",
    "version": "latest"
  },
  {
    "offer": "debian-10",
    "publisher": "Debian",
    "sku": "10",
    "urn": "Debian:debian-10:10:latest",
    "urnAlias": "Debian",
    "version": "latest"
  },
  {
    "offer": "flatcar-container-linux-free",
    "publisher": "kinvolk",
    "sku": "stable",
    "urn": "kinvolk:flatcar-container-linux-free:stable:latest",
    "urnAlias": "Flatcar",
    "version": "latest"
  },
  {
    "offer": "openSUSE-Leap",
    "publisher": "SUSE",
    "sku": "42.3",
    "urn": "SUSE:openSUSE-Leap:42.3:latest",
    "urnAlias": "openSUSE-Leap",
    "version": "latest"
  },
  {
    "offer": "RHEL",
    "publisher": "RedHat",
    "sku": "7-LVM",
    "urn": "RedHat:RHEL:7-LVM:latest",
    "urnAlias": "RHEL",
    "version": "latest"
  },
  {
    "offer": "SLES",
    "publisher": "SUSE",
    "sku": "15",
    "urn": "SUSE:SLES:15:latest",
    "urnAlias": "SLES",
    "version": "latest"
  },
  {
    "offer": "UbuntuServer",
    "publisher": "Canonical",
    "sku": "18.04-LTS",
    "urn": "Canonical:UbuntuServer:18.04-LTS:latest",
    "urnAlias": "UbuntuLTS",
    "version": "latest"
  },
  {
    "offer": "WindowsServer",
    "publisher": "MicrosoftWindowsServer",
    "sku": "2019-Datacenter",
    "urn": "MicrosoftWindowsServer:WindowsServer:2019-Datacenter:latest",
    "urnAlias": "Win2019Datacenter",
    "version": "latest"
  },
  {
    "offer": "WindowsServer",
    "publisher": "MicrosoftWindowsServer",
    "sku": "2016-Datacenter",
    "urn": "MicrosoftWindowsServer:WindowsServer:2016-Datacenter:latest",
    "urnAlias": "Win2016Datacenter",
    "version": "latest"
  },
  {
    "offer": "WindowsServer",
    "publisher": "MicrosoftWindowsServer",
    "sku": "2012-R2-Datacenter",
    "urn": "MicrosoftWindowsServer:WindowsServer:2012-R2-Datacenter:latest",
    "urnAlias": "Win2012R2Datacenter",
    "version": "latest"
  },
  {
    "offer": "WindowsServer",
    "publisher": "MicrosoftWindowsServer",
    "sku": "2012-Datacenter",
    "urn": "MicrosoftWindowsServer:WindowsServer:2012-Datacenter:latest",
    "urnAlias": "Win2012Datacenter",
    "version": "latest"
  },
  {
    "offer": "WindowsServer",
    "publisher": "MicrosoftWindowsServer",
    "sku": "2008-R2-SP1",
    "urn": "MicrosoftWindowsServer:WindowsServer:2008-R2-SP1:latest",
    "urnAlias": "Win2008R2SP1",
    "version": "latest"
  }
]

In order to narrow down and find Ubuntu available images (use grep instead of Select-string for Unix environments)

az vm image list-offers -p canonical -l eastus | Select-String name

Ubuntu images names for east us region:

 "name": "0001-com-ubuntu-confidential-vm-experimental",
    "name": "0001-com-ubuntu-confidential-vm-focal",
    "name": "0001-com-ubuntu-confidential-vm-test-focal",
    "name": "0001-com-ubuntu-minimal-focal-daily",
    "name": "0001-com-ubuntu-minimal-groovy-daily",
    "name": "0001-com-ubuntu-minimal-hirsute-daily",
    "name": "0001-com-ubuntu-minimal-impish-daily",
    "name": "0001-com-ubuntu-minimal-jammy-daily",
    "name": "0001-com-ubuntu-private-fips-motorola",
    "name": "0001-com-ubuntu-pro-advanced-sla",
    "name": "0001-com-ubuntu-pro-advanced-sla-att",
    "name": "0001-com-ubuntu-pro-advanced-sla-csw",
    "name": "0001-com-ubuntu-pro-advanced-sla-dd",
    "name": "0001-com-ubuntu-pro-advanced-sla-nestle",
    "name": "0001-com-ubuntu-pro-advanced-sla-servicenow",
    "name": "0001-com-ubuntu-pro-advanced-sla-shell",
    "name": "0001-com-ubuntu-pro-advanced-sla-ub01",
    "name": "0001-com-ubuntu-pro-advanced-sla-unp",
    "name": "0001-com-ubuntu-pro-bionic",
    "name": "0001-com-ubuntu-pro-bionic-fips",
    "name": "0001-com-ubuntu-pro-focal",
    "name": "0001-com-ubuntu-pro-focal-fips",
    "name": "0001-com-ubuntu-pro-hidden-msft-fips",
    "name": "0001-com-ubuntu-pro-microsoft",
    "name": "0001-com-ubuntu-pro-trusty",
    "name": "0001-com-ubuntu-pro-xenial",
    "name": "0001-com-ubuntu-pro-xenial-fips",
    "name": "0001-com-ubuntu-server-eoan",
    "name": "0001-com-ubuntu-server-focal",
    "name": "0001-com-ubuntu-server-focal-daily",
    "name": "0001-com-ubuntu-server-groovy",
    "name": "0001-com-ubuntu-server-groovy-daily",
    "name": "0001-com-ubuntu-server-hirsute",
    "name": "0001-com-ubuntu-server-hirsute-daily",
    "name": "0001-com-ubuntu-server-impish",
    "name": "0001-com-ubuntu-server-impish-daily",
    "name": "0001-com-ubuntu-server-jammy-daily",
    "name": "0002-com-ubuntu-minimal-bionic-daily",
    "name": "0002-com-ubuntu-minimal-disco-daily",
    "name": "0002-com-ubuntu-minimal-focal-daily",
    "name": "0002-com-ubuntu-minimal-xenial-daily",
    "name": "0003-com-ubuntu-minimal-eoan-daily",
    "name": "0003-com-ubuntu-server-trusted-vm",
    "name": "test-ubuntu-premium-offer-0002",
    "name": "Ubuntu15.04Snappy",
    "name": "Ubuntu15.04SnappyDocker",
    "name": "UbuntuServer",

Specific information about an image:

az vm image list -p canonical -l eastus --offer 0001-com-ubuntu-pro-bionic --all --sku pro-18_04-lts

Inside linux or windows folder depending on the resource you want to deploy apply your terraform configuration

terraform init
terraform apply

After the successful run of the terraform script.

In order to delete the environment you can run

terraform destroy

By committing destroy your eight resources that deal with your virtual machine will disappear.

Repository for the code:

https://github.com/geralexgr/terraform-az-lin-win

Video tutorial on YouTube: