If the retention policies are not defined properly on Azure DevOps you may encounter out of space issues on your windows build containers. Take for example the below build, which stopped as it could not copy the necessary files on the build/temp folder.
In order to fix the build, you can connect to the windows server which runs the containers and get a prompt for the one that failed.
docker exec -it agent-name-01 cmd.exe
You can then check for the available free space:
Navigate to folder work and delete some build folders to free up space.
In this article I will explain how to create a Power platform environment and connect on it through Azure Devops pipelines. Power platform is a low code environment provided by Microsoft that can implement services and functionality quickly with a GUI.
In order to follow the tutorial you will need an Azure subscription and a power platform subscription which will be connected.
First things first, you should create a power platform environment. You can do this, by logging in the Power Platform admin center and pressing the New button.
Then you should select the type and region and also the database connection. I chose a sample database so that I get automatically data to test.
By choosing the trial subscription the environment only works for 30 days. This is good enough for the purposes of this article but not for production environments. After the provision of the environment you will get the environment URL and also some sessions details that will be needed for Azure devops.
You can find the sessions details on the right upper corner.
The you will need to create an app registration on your Azure subscription.
Press New registration
Give a name and select which accounts could access this application.
After the provision of the application, you will have to set the API permissions. Select Dynamics CRM -> User impersonation
Then you will have to create a secret for the application. Go to certificates and secrets and create a new client secret. Copy the value, as it will be needed later.
On Azure Devops you should create a service connection. Go to project settings -> Serviceconnections and add a new connection. Select power platform on the connection type.
You should then add the connection details gathered on previous steps. Client secret and application ID from the Azure application that you created. The server URL and tenant ID can be gathered from power platform admin center.
Then go and create a new Pipeline on Azure Devops and add the below two steps. The power platform tools installer is required any time you want to connect on power platform. This will instruct the build agent to download the necessary tools for the deployment. The WhoAmI task will authenticate with the instance and verify if the connection is working.
Edit the WhoAmI step and include the service connection
Check the result of the task, as it should be successful (Green)
Group variables is a functionality provided by Azure pipelines that let one handle a lot of variables as one entity. It also supports key vault integration but also secrets on comparison with the standard pipeline variables which should not be used as secrets according to Microsoft, as their value can be seen.
In this article I will describe how you can use variable groups for different deployments based on the environment you work. For example the company may want to differentiate the variables for a product on the test and production version. This could be injected and handled on the pipeline accordingly with group variables and parameters.
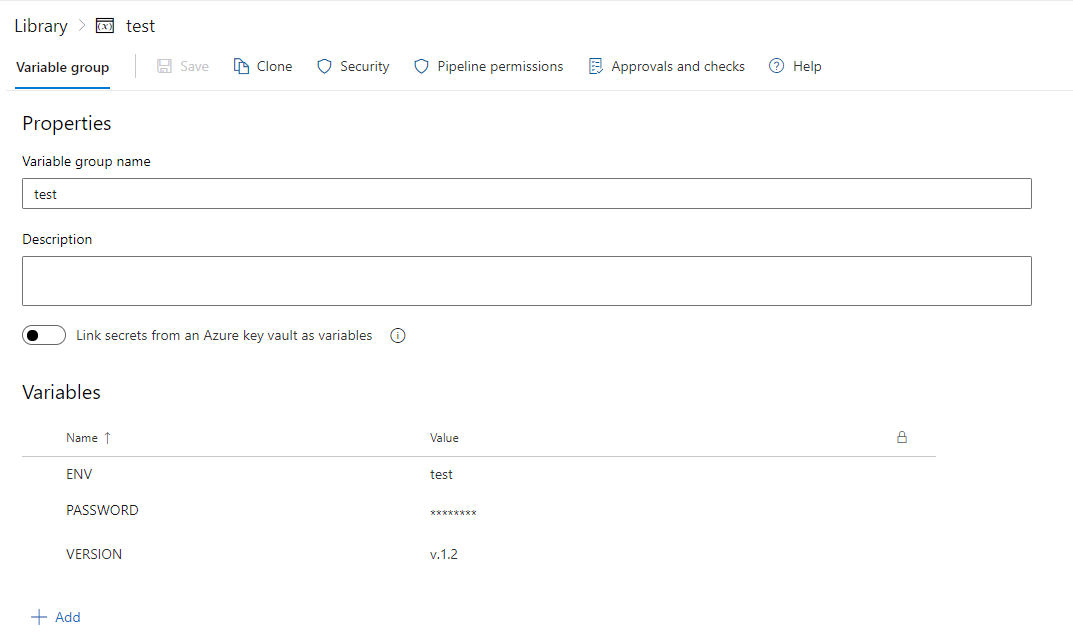
This article refers to a product which has the same variables (version, password, environment) on test and prod, but their values are different.
In order to create a variable group you should go to Pipelines -> Library -> +Variable group.
The values which I provided on prod variable group are below:
Accordingly the same values exist for test.
The pipeline will trigger when a commit is merged on the main branch.
trigger:
- main
parameters:
- name: environment
displayName: Where to deploy?
type: string
default: test
values:
- prod
- test
pool:
vmImage: ubuntu-latest
variables:
- group: ${{parameters.environment}}
steps:
- script: |
echo $(ENV)
echo $(VERSION)
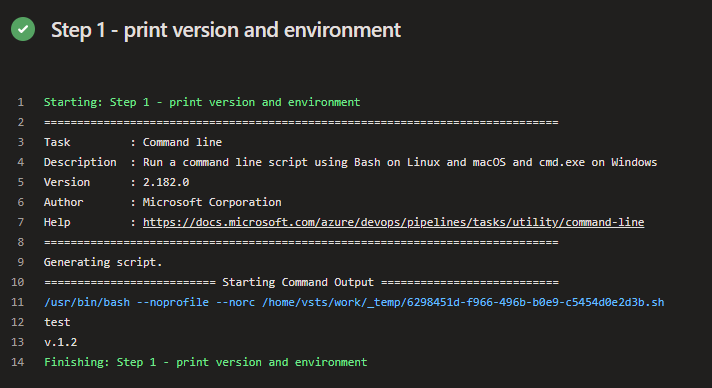
displayName: Step 1 - print version and environment
- script: echo $(PASSWORD)
displayName: Step 2 - print secret
- script: pwd ENV ${{parameters.environment}}
displayName: Step 3 - print parameter
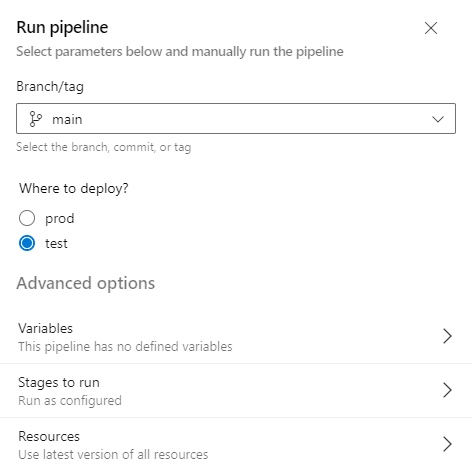
By running the pipeline the type of environment will be asked
Depending on the selected input, the group variables of the specific category will be printed. If I run with test as input then I will get the test version and env variable.
If you extend the virtual disk that holds the root partition of a linux server, you should extend the physical storage and filesystem in order to allocate the available space. In this article I will explain how to perform the necessary actions to archive this goal.
At first you can see that physical volume is currently 200GB.
In order to extend you should use parted and select the volume which holds the root filesystem. In my case it was number 3 and I performed the extension through the command:
parted -s -a opt devsda 'resizepart 3 100%'
If you check the vg space you may notice that space is not allocated yet.
Then you should perform a pvresize for the aforementioned partition and the space will be provided on the volume group.