Posted on Leave a comment

Build and run .NET applications on Azure DevOps

In this article I will explain how one can automate their .NET applications development using Azure DevOps. For the sake of this example I created a simple Console Application targeting .NET Framework 6.

The code only includes the below line.

Console.WriteLine("Hello from Azure Devops!");

First things first, a Git repository will be needed for the CI procedure. I chose to use Azure DevOps repositories as it is integrated with Visual studio and can be used very quickly. By pressing Add to Source Control a dialog will appear to choose the organization and project on which the repository will be created. This will create a new repository and you should then commit and push your code to the repository using the UI of Visual Studio.

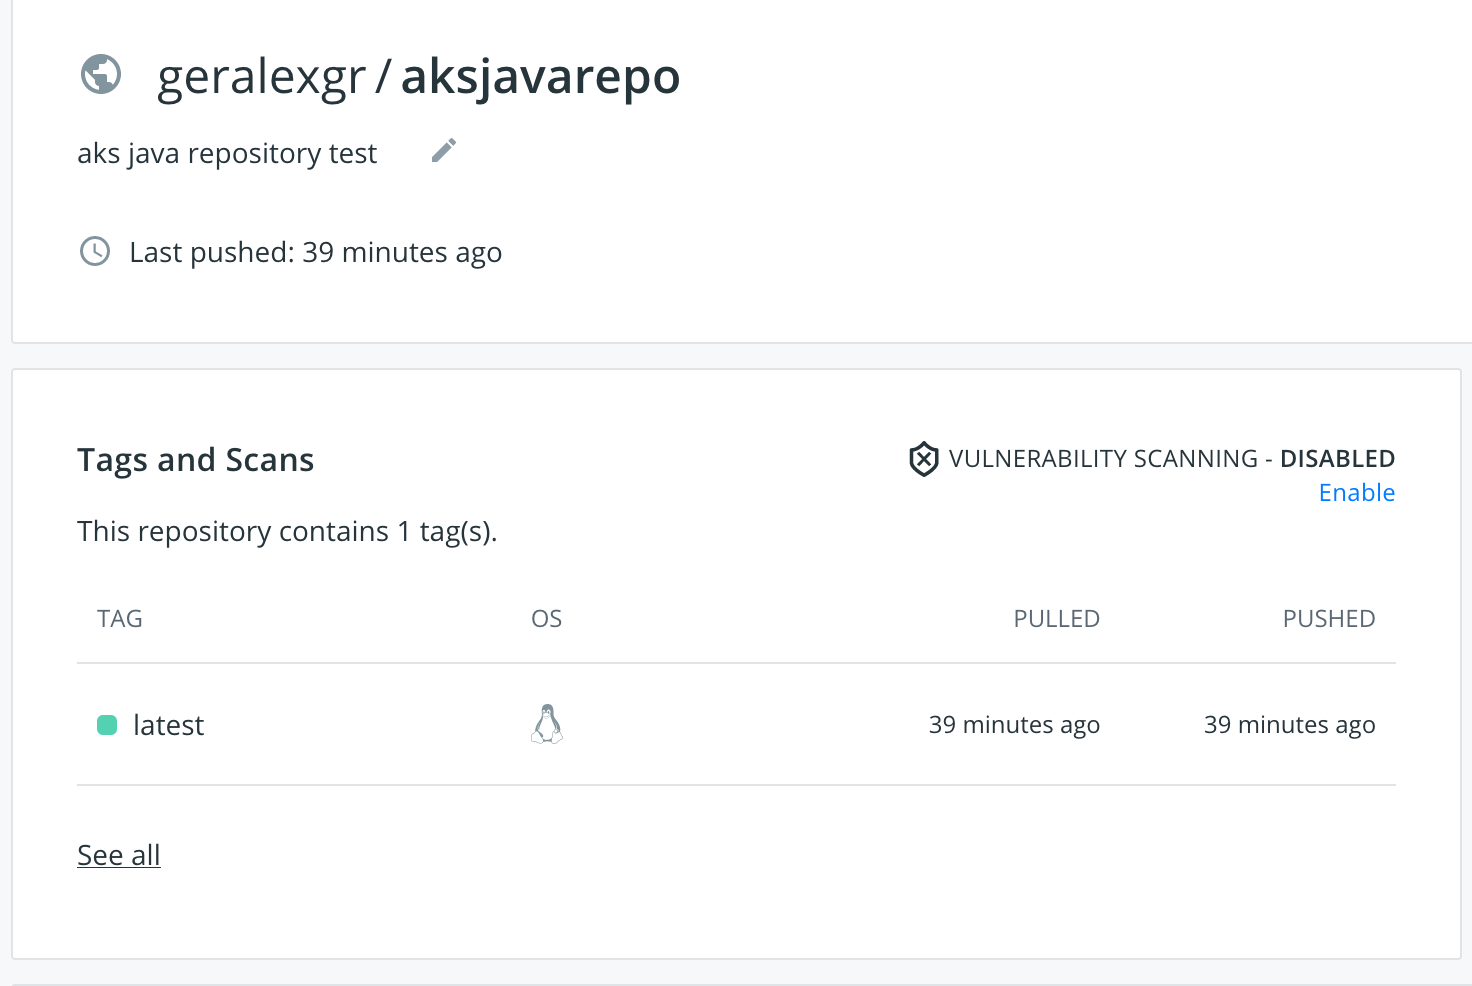
After the push, the repository will be created on Azure DevOps

I disabled the automatic triggers on the repository with pr and trigger to none and I used the latest ubuntu machine as the build agent.

If a specific version of .NET is required it should be included in the task UseDotNet@2.

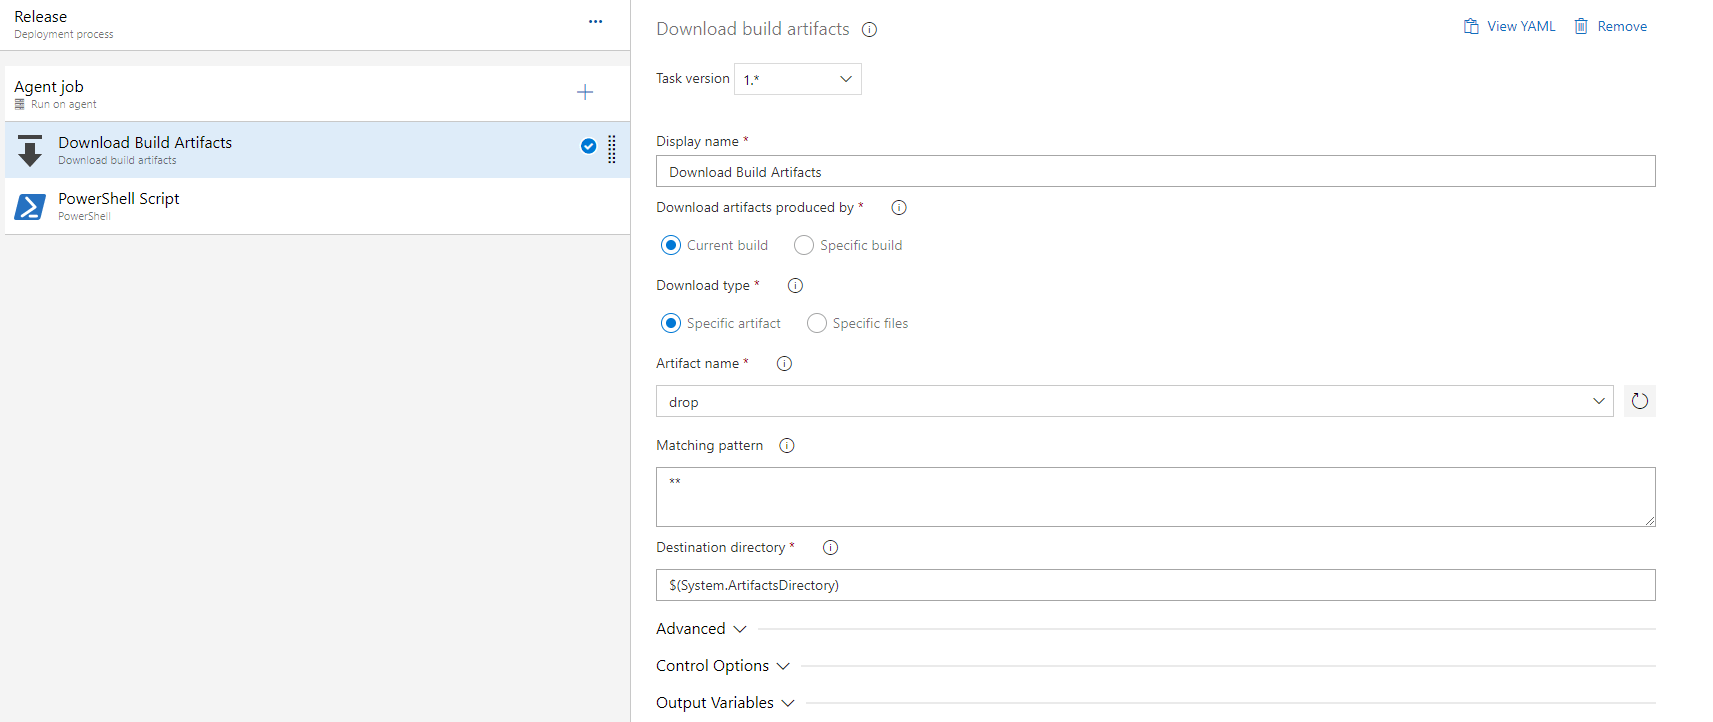
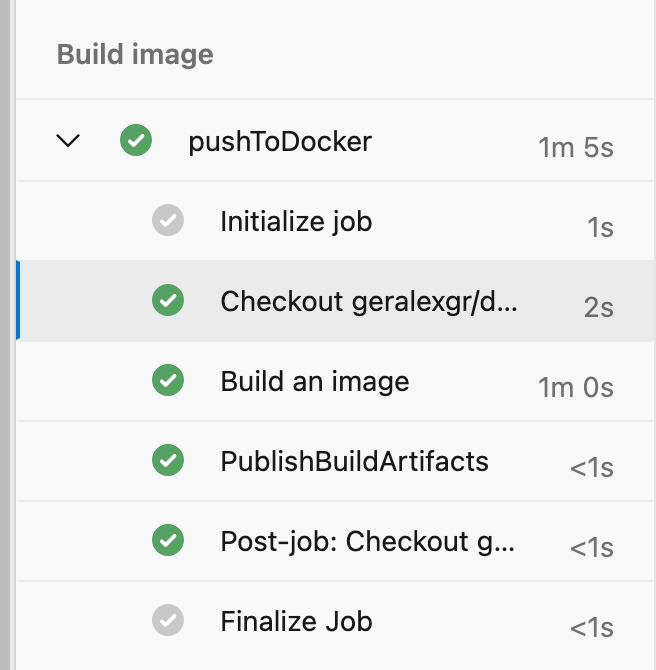
The building of the project is done from the DotNetCoreCLI@2 task. It will search everything with the .csproj extension and build it using the Azure CLI.

The last task that I included will run the application from the debug output folder.

trigger:
- none

pr: none 

pool:
  vmImage: ubuntu-latest

steps:

- task: UseDotNet@2
  inputs:
    version: '6.0.x'
    includePreviewVersions: true
    

- task: DotNetCoreCLI@2
  displayName: Building .NET project
  inputs:
    command: 'build'
    projects: '**/*.csproj'
    arguments: '--configuration debug'
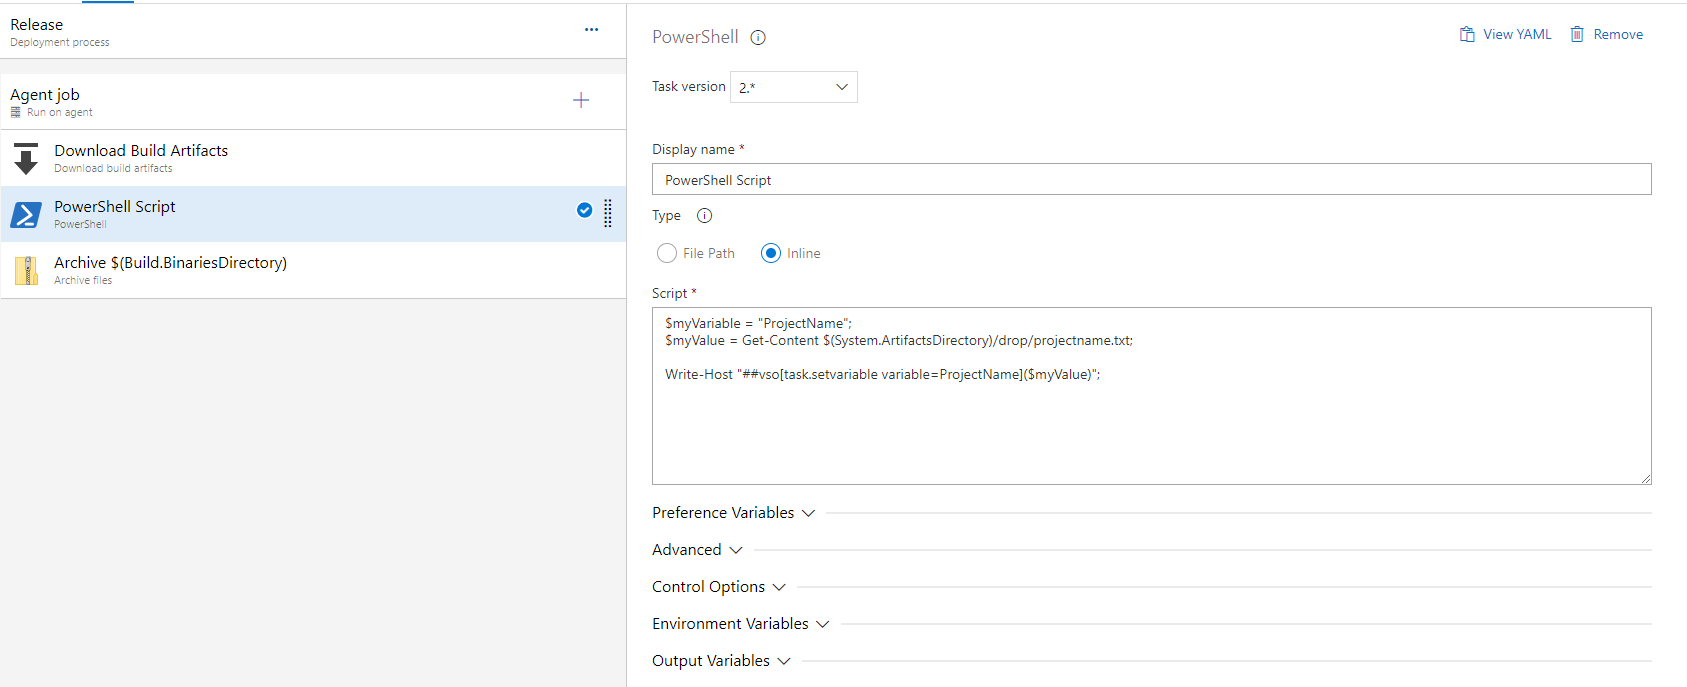
- task: PowerShell@2
  inputs:
    targetType: 'inline'
    script: |
      cd "bin/debug/net6.0"
      ./ConsoleApp1

As my application only Included a print message, this will be shown on the output.

More details on how to build .NET projects with Azure DevOps

https://docs.microsoft.com/en-us/azure/devops/pipelines/ecosystems/dotnet-core?view=azure-devops&tabs=dotnetfive

Posted on 5 Comments

Pass parameters from build to release pipelines on Azure devops

When you need to pass parameters between your build and release pipelines it could be a real struggle if you do not want to use variable groups. Variable groups can accomplish the requested (to pass values between build and release pipelines) but this scenario is not useful for a parametric input which is a common case when deploying a project. You can accomplish that either by using a plugin from another publisher or by following the publish artifacts procedure that I will describe.

In order to pass variables between your build and release pipelines you can create/export a file containing your variable on your build agent. This file should be exported as build artifact and then downloaded on the release pipeline.

The below build pipeline implements the functionality I described. The exported file is named projectname.txt and will be located on artifacts folder on your build agent inside folder drop. For example C:\agent\1\a\drop

trigger:
- dev

pool:
  vmImage: windows-latest

parameters:
  - name: powerenvironment
    displayName: Where to deploy?
    type: string

steps:

- task: PowerShell@2
  inputs:
    targetType: 'inline'
    script: |
      $variable = '${{parameters.powerenvironment}}'
      $variable | Out-File $(Build.ArtifactStagingDirectory)\projectname.txt
      Get-Content $(Build.ArtifactStagingDirectory)\projectname.txt

- task: PublishBuildArtifacts@1
  inputs:
    PathtoPublish: '$(Build.ArtifactStagingDirectory)'
    ArtifactName: 'drop'
    publishLocation: 'Container'

When you run the pipeline you will be asked for a parameter. I gave this entry my name which will be passed on release.

My release pipeline will download the build artifacts and get the value of the file. The release pipeline includes two steps.

The first one downloads the folder drop from build artifacts. The projectname.txt is located there.

Then the powershell will print the contents of the projectname.txt

You can check the result and verify you get the parameter input value from the powershell script.

Bonus content:

You can also write your input parameter as a variable on the build agent and reference this value on a later step. This should be again a powershell step on your release pipeline.

$myVariable = "ProjectName";
$myValue = Get-Content $(System.ArtifactsDirectory)/drop/projectname.txt;

Write-Host "##vso[task.setvariable variable=ProjectName]($myValue)";

Lastly create a dump archive step to reference the input parameter from the build pipeline.

In order to test, use in the archive path the ProjectName variable.

Run the pipeline and verify that input parameter is correct (I used gerasimos).

Youtube video:

Posted on Leave a comment

Create a build pipeline and push Image to external repository with Azure Devops

Azure Devops is the powerful Microsoft product for Devops solutions. In this article I will explain how you can create a build pipeline using predefined actions and tools provided in order to push an image to an external repository like Docker hub.

As a first step you should create two new service connections. As I am using Github, the one will be a github connection and a docker hub connection. To accomplish that you should go to project settings -> service connections and connect your accounts with your password credentials.

When you complete this step, the connected accounts will appear.

Then you should go to pipelines menu and create a new one. My pipeline has the name main-pipeline.

Azure Devops provides a large list of predefined tasks that will make your implementation easier and quicker. In my case I selected the build of a Dockerfile that will be listed in the Github repository.

In more detail the code will be checkout from the repository and the image will be created using a building machine that Azure provides from a shared pool of agents.

You can find the pipeline code below:

# Docker
# Build a Docker image
# https://docs.microsoft.com/azure/devops/pipelines/languages/docker

trigger:
- master

resources:
- repo: self

variables:
  tag: 'latest'

stages:
- stage: Build
  displayName: Build image
  jobs:
  - job: pushToDocker
    displayName: pushToDocker
    steps:
    - task: Docker@2
      displayName: Build an image
      inputs:
        containerRegistry: 'geralexgr-docker-repo'
        repository: 'geralexgr/aksjavarepo'
        command: 'buildAndPush'
        Dockerfile: '**/Dockerfile'
        tags: latest
    - task: PublishBuildArtifacts@1
      inputs:
        PathtoPublish: '$(Build.ArtifactStagingDirectory)'
        ArtifactName: 'drop'
        publishLocation: 'Container'

A successful run of the pipeline is shown below. As the code indicates the tag of the image should be the latest.

The created image will be stored on docker hub as indicated in the instructions.

You can then go and pull your image locally to test the result. In my case I would use:

docker pull geralexgr/aksjavarepo:latest