Posted on 1 Comment

Array Left Rotation by D – C# Code

left rotation operation on an array of size n shifts each of the array’s elements 1 unit to the left. For example, if 2 left rotations are performed on array [1,2,3,4,5], then the array would become  [3,4,5,1,2].

Given an array of  n integers and a number, d , perform d left rotations on the array. Then print the updated array as a single line of space-separated integers.

Input Format

The first line contains two space-separated integers denoting the respective values of  (the number of integers) and  (the number of left rotations you must perform).
The second line contains  space-separated integers describing the respective elements of the array’s initial state.

Output Format

Print a single line of  space-separated integers denoting the final state of the array after performing  left rotations.
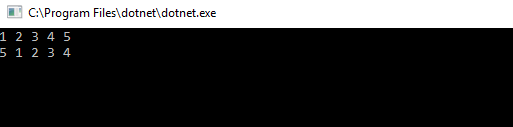
Sample Input

5 4
1 2 3 4 5

Sample Output

5 1 2 3 4

 
Explanation


Code

 static int[] LeftRotationByD(int[] a,int k)
        {
            int[] b = new int[a.Length];

            int index;
            int length = a.Length;
            int place;


            for (int i = 0; i < length; i++)
            {
                index = i - k;
                place = length + index;
                if (index >= 0)
                {
                    b[index] = a[i];
                }
                else
                {
                    b[place] = a[i];
                }
            }
            return b;

        }


We can see the results for 1 and 4 rotations as follows:


Posted on 4 Comments

Bottom Navigation Bar with Control – Xamarin.Forms

Ever wondered how to create a Bottom Navigation Bar for Xamarin.Forms as it is in the latest Android sdk version? As there is no native control for Xamarin.Forms you could create a custom one with a Control.

First create a Folder and name it Controls and create the control in there.

In your portable class library -> Add New Item -> Content View and name it NavigationBar or something else.


For my purposes I used the following code:

 <Grid   BackgroundColor="Blue" >

            <Grid.ColumnDefinitions>
                <ColumnDefinition Width="*" />
                <ColumnDefinition Width="*" />
                <ColumnDefinition Width="*" />
            </Grid.ColumnDefinitions>

            <StackLayout Orientation="Vertical" Grid.Column="0" HorizontalOptions="CenterAndExpand" VerticalOptions="End">
                <Image  Source="Home.png"  WidthRequest="30" HeightRequest="30" />
                <Label Text="Home" TextColor="White"  />
            </StackLayout>

            <StackLayout Orientation="Vertical"  Grid.Column="1"  HorizontalOptions="CenterAndExpand" VerticalOptions="End">
                <Image Source="Pages.png" WidthRequest="30" HeightRequest="30"  />
                <Label Text="Pages" TextColor="White"  />
            </StackLayout>

            <StackLayout Orientation="Vertical"  Grid.Column="2"  HorizontalOptions="CenterAndExpand" VerticalOptions="End">
                <Image  Source="Settings.png"  WidthRequest="30" HeightRequest="30" />
                <Label Text="Settings" TextColor="White" />
            </StackLayout>
        </Grid>

In order to use it in your code reference it in your xaml

xmlns:controls="clr-namespace:project.Controls"

And then just use

<controls:NavigationBar />

Finally you can use your control and it will look the same in all platforms.

Posted on Leave a comment

Local Database with Realm – Xamarin.Forms

Realm is a very popular solution for mobile databases as it includes very nice features, it’s very quick and easy to use. It supports many platforms as well as Xamarin.

You can use realm with Xamarin.Forms after installing the nuget package. Be careful to install nuget package to Android, iOS and UWP seperate project.

Current realm version is 1.5. After choosing Realm package, nuget will also install all available requirements.

First of all in order to store items in the database, you should create a model which will represent the identity that you want to save. For example lets say that we want a Person identity so we will store Persons.

Lets create the necessary model for this case:

public class Person
{
public string Name { get; set; }
public int Age { get; set; }
}

After that we  will create a test interface in which we can add some users and interact with realm.

  <StackLayout HorizontalOptions="Center" VerticalOptions="Center">
        <Entry  x:Name="name" Placeholder="Enter Name" Margin="0,20,0,0" WidthRequest="200"  />
        <Entry x:Name="age" Placeholder="Enter Age" Margin="0,20,0,0"  WidthRequest="200" />
        <Button Text="Add a new Item" Margin="0,20,0,0" Clicked="addperson" />
        <Button Text="Load all items" Margin="0,20,0,0" Clicked="loadpersons" />
    </StackLayout>


To interact with the database lets create a RealHelper class which we will use to add persons and load.

public class RealmHelper
    {
        Realm realm;
        Transaction transaction;

        public RealmHelper()
        {
            realm = Realm.GetInstance();
        }


        public void AddItem(Person person)
        {

            transaction = realm.BeginWrite();
            var entry = realm.Add(person);
            transaction.Commit();
        }

        public IEnumerable<Person> GetItems()
        {
            return realm.All<Person>();
        }
    }


In order to make a write operation we use a transaction and we do that by creating a write with beginWrite(). More information for the functions and how they operation can be found on the documentation.


 RealmHelper rh;
        
public MainPage()
	{
	    InitializeComponent();
            rh = new RealmHelper();
        }


The main logic comes from the two buttons:

private async void addperson(object sender, EventArgs e)
        {
            var person = new Person();
            person.Name = name.Text;
            person.Age = age.Text;
            rh.AddItem(person);
            await DisplayAlert("Ok", "A new person was added", "OK");
        }

        private void loadpersons(object sender, EventArgs e)
        {
            IEnumerable<Person> collection = rh.GetItems();

        }


Putting a breakpoint in the loadPersons button we can see the stored persons.


initialization issues I found:

  • In the UWP project you must install realm database nuget package and not realm nuget package. That’s because some functions don’t exist in the uwp apis so if you install realm package some exceptions will occur during the opening of the app.
  • Check if fody file exists in both iOS, Android and UWP projects and the its content should be
<?xml version="1.0" encoding="utf-8"?>
<Weavers>
<RealmWeaver/>
</Weavers>
  • Be sure that all packages are updated across all projects and are the same version.


Posted on Leave a comment

Extend available properties of User.Identity – Asp.Net [web api]

Asp.net web api by default contains some pre configured fields that can handle the registration of a user in a web app. Some of them are Email, Password, Confirm Password and others. You can extend those properties and include your own for your purposes with the following procedure.

First of all you need to execute some commands in the package manager. You can find nuget package manager in Tools -> Nuget Package Manager -> PM Console 

The first thing to do is to enable Migrations

Enable-Migrations

The you can go to Models\AccountBindingModels.cs and add your property to the class RegisterBindingModel. Also add the same property in the Models\IdentityModels.cs inside ApplicationUser class. For example lets assume you want to add a username in the registration proccess. For this purpose you can use the following line

 public string AppUserName { get; set; }

Also include in the file.

using System;

The you must execute:

Add-Migration "AppUserName"
Update-Database

Those commands will run all the migration files and update the database schema to add a AppUserName column in your database.

Then update the registration action in Controllers\AccountController.cs to store AppUserName as well.

var user = new ApplicationUser() { UserName = model.Email, Email = model.Email, AppUserName = model.AppUserName };

It was that easy. you can finally find AppUserName in your database.